
EPT設定フォームの拡張
新しい EPT 設定フォームクラスの作成
多くのプログラマーから、EPT モジュールの設定数(DOM Box、背景、枠線、クラスなど)について心配の声を聞きました。これらのプログラマーは、コンテンツ編集者が混乱したり、あるいは大きく異なる段落、余白、背景を使うように 促される ことを懸念していました。コンテンツ編集者に柔軟性ともっと多くの設定を必要とするプロジェクトもありますが、コンポーネントが明確に定義されたストーリーブックを持つプロジェクトもあります。 このような場合には、EPT 設定フィールドウィジェットを変更する必要があります。
また、新しい EPT モジュールを作成してオプション付きの JavaScript プラグインを組み込んだ場合も、そのオプション用の設定フィールドを持つ独自の EPT 設定ウィジェットを使用する必要があります。
EPT Core モジュールには、EPT 設定フィールドウィジェット用の EptSettingsDefaultWidget クラスがあります。これには DOM Box、背景、その他すべての設定が含まれます。新しいクラス EptSettingsSimpleWidget を作成しましょう(EPT Core モジュール内に置きます)。これには Width(幅)と Spacing(段落下の余白)の3つの設定のみが含まれます。
新しいファイルを作成します:
/src/Plugin/Field/FieldWidget/EptSettingsSimpleWidget.php
<?php

namespace Drupal\ept_core\Plugin\Field\FieldWidget;

use Drupal\Core\Field\FieldItemListInterface;
use Drupal\Core\Form\FormStateInterface;
use Drupal\Component\Utility\Color;
use Drupal\Core\StringTranslation\TranslatableMarkup;
use Drupal\ept_core\Plugin\Field\FieldWidget\EptSettingsDefaultWidget;

/**
 * Plugin implementation of the 'ept_settings_simple' widget.
 *
 * @FieldWidget(
 *   id = "ept_settings_simple",
 *   label = @Translation("EPT simple paragraph settings"),
 *   field_types = {
 *     "ept_settings"
 *   }
 * )
 */
class EptSettingsSimpleWidget extends EptSettingsDefaultWidget  {

  /**
   * {@inheritdoc}
   */
  public function formElement(FieldItemListInterface $items, $delta, array $element, array &$form, FormStateInterface $form_state) {
    $element = parent::formElement($items, $delta, $element, $form, $form_state);


    return $element;
  }

  /**
   * {@inheritdoc}
   */
  public function massageFormValues(array $values, array $form, FormStateInterface $form_state) {
    foreach ($values as &$value) {
      $value += ['ept_settings' => []];
    }
    return $values;
  }

}
基本設定クラス EptSettingsDefaultWidget を拡張します。アノテーションコメント @FieldWidget では、ウィジェットを id = "ept_settings_simple" と名付け、ラベルを label = @Translation("EPT Simple settings") とします。
/**
 * Plugin implementation of the 'ept_settings_simple' widget.
 *
 * @FieldWidget(
 *   id = "ept_settings_simple",
 *   label = @Translation("EPT simple paragraph settings"),
 *   field_types = {
 *     "ept_settings"
 *   }
 * )
 */
また、formElement()、 massageFormValues() という2つのメソッドがあります。massageFormValues() はそのままにしておいても構いません。Drupal はすべての設定を単一のフィールド field_ept_settings に自動的にシリアライズします。つまり、設定がいくつあっても関係なく、シリアライズされた配列として保存されるため、Form API で設定フィールドを指定するだけで済みます:
https://www.drupal.org/docs/drupal-apis/form-api
formElement() では設定フィールドを定義します。DOM Box と枠線の設定を非表示にしましょう:
  /**
   * {@inheritdoc}
   */
  public function formElement(FieldItemListInterface $items, $delta, array $element, array &$form, FormStateInterface $form_state) {
    $element = parent::formElement($items, $delta, $element, $form, $form_state);
    unset($element['ept_settings']['design_options']['box1']);
    unset($element['ept_settings']['design_options']['other_settings']['border_color']);
    unset($element['ept_settings']['design_options']['other_settings']['border_style']);
    unset($element['ept_settings']['design_options']['other_settings']['border_radius']);

    return $element;
  }
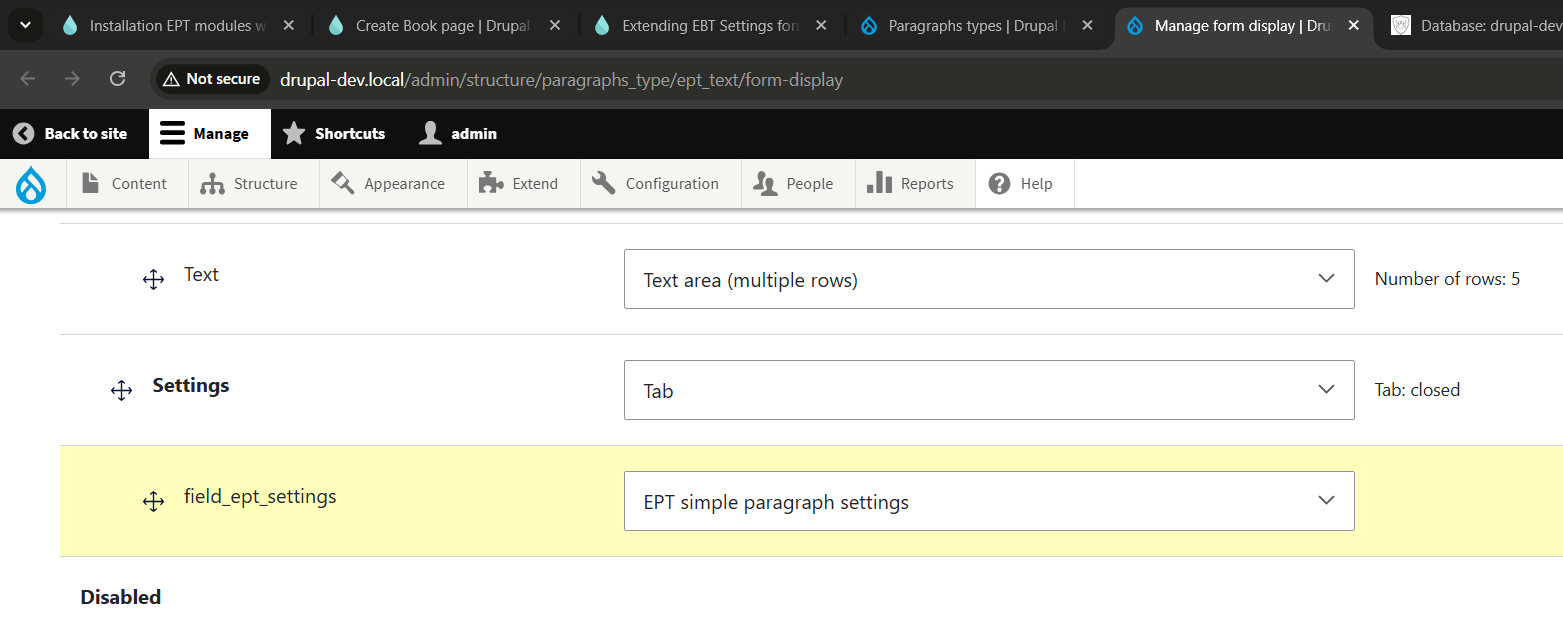
EPT パラグラフタイプのいずれかに新しいフィールドウィジェットを適用すると:
より小さな設定フォームが表示されます:
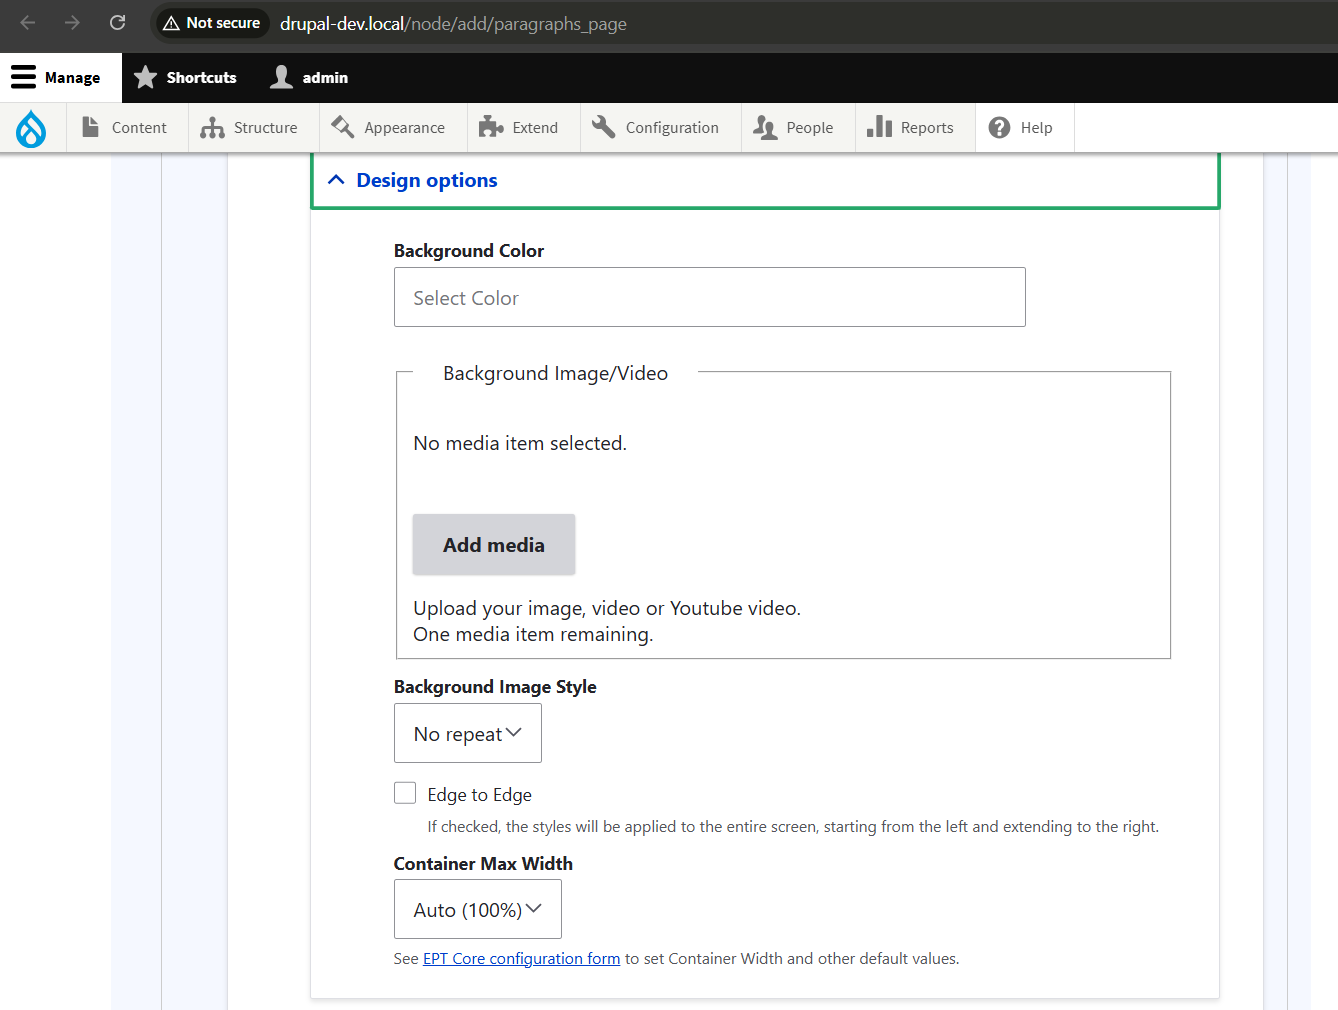
次に背景設定も削除します。背景設定が必要だが他の設定は不要な場合は、EptSettingsDefaultWidget クラスを拡張して独自のフィールドウィジェットを作成できます。以下は EPT 設定をできるだけ小さくする方法の例です。
...
    unset($element['ept_settings']['design_options']['other_settings']['background_color']);
    unset($element['ept_settings']['design_options']['other_settings']['background_media']);
    unset($element['ept_settings']['design_options']['other_settings']['background_image_style']);
...
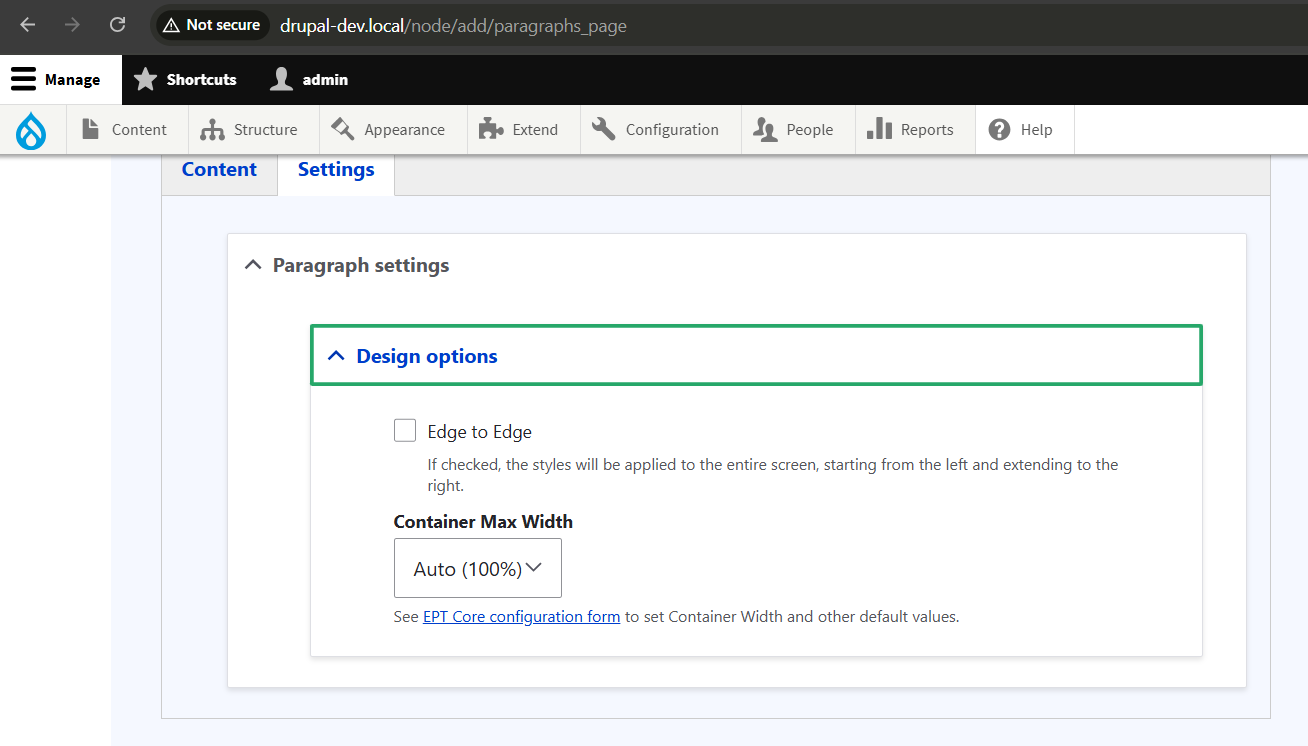
フォームにはすでに2つの設定だけが残っています:
残るは、下側に余白を追加するための Spacing フィールドを追加することだけです。スペーシングを整理するために追加のクラスと CSS を使用します:
spacing-none,
spacing-sm,
spacing-md,
spacing-lg,
spacing-xl,
spacing-xxl
より大きいスペーシングのリストが必要になるかもしれませんが、EptSettingsDefaultWidget クラスで行ったのと同じように、EptSettingsSimpleWidget クラスを拡張してそこから独自のフィールドウィジェットクラスを作成しても構いません。
$element['ept_settings']['design_options']['other_settings']['spacing'] = [
      '#type' => 'select',
      '#title' => $this->t('Background Image Style'),
      '#options' => [
        'spacing-none' => $this->t('None'),
        'spacing-sm' => $this->t('Small'),
        'spacing-md' => $this->t('Medium'),
        'spacing-lg' => $this->t('Large'),
        'spacing-xl' => $this->t('Extra Large'),
        'spacing-xxl' => $this->t('Double Extra Large'),
      ],
      '#default_value' => $items[$delta]->ept_settings['design_options']['other_settings']['spacing'] ?? 'spacing-none',
    ];
ブロックにスタイルを追加する方法は3つあります:
1. ブロックテンプレートをオーバーライドし、ブロッククラスとしてスペーシングを設定します。
2. スタイルをその場で生成し、各パラグラフのカスタム CSS スタイルとして含めます。
3. 各 EPT パラグラフ用のカスタム JavaScript を生成してクラスを追加します。
4. template_preprocess_block() 関数でクラスのリストをオーバーライドします。
いずれの方法でも機能しますが、template_process_paragraph() 関数を使う方が簡単だと思います。少なくとも、ebt_core.module ファイルにはすでに ept_core_preprocess_block() 関数があります。それを使いましょう:
...
  if (!empty($ept_settings[0]['ept_settings']['design_options']['other_settings']['spacing'])) {
    $variables['attributes']['class'][] = $ept_settings[0]['ept_settings']['design_options']['other_settings']['spacing'];
  }
...
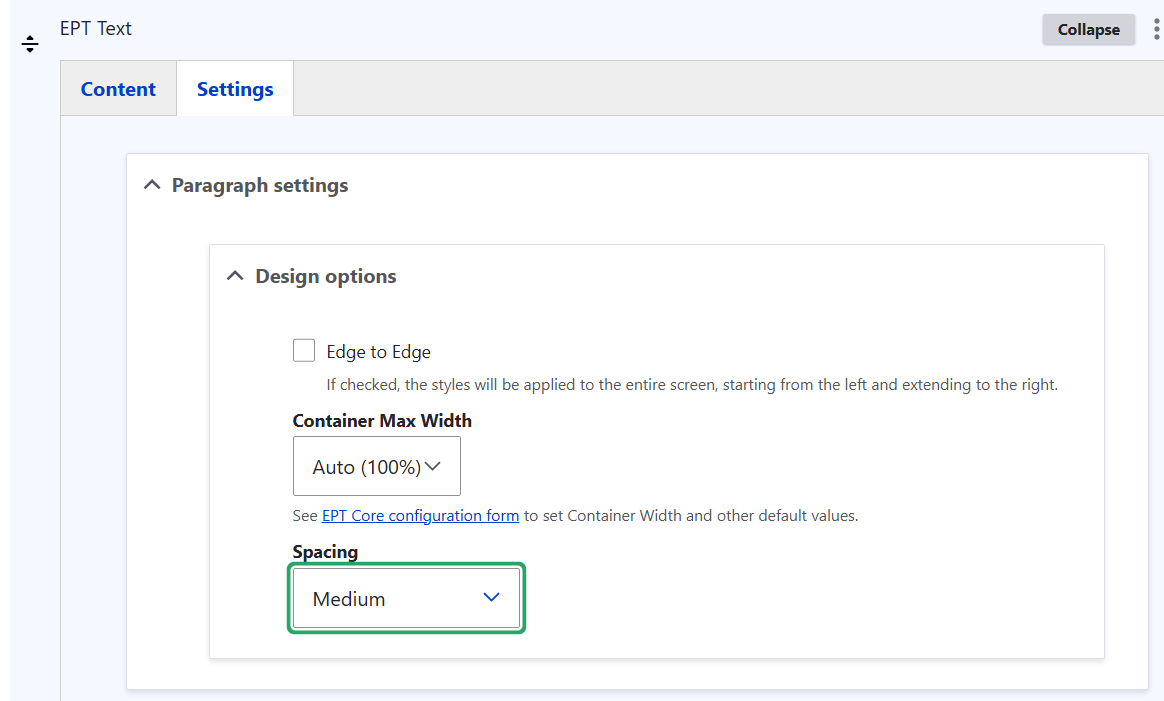
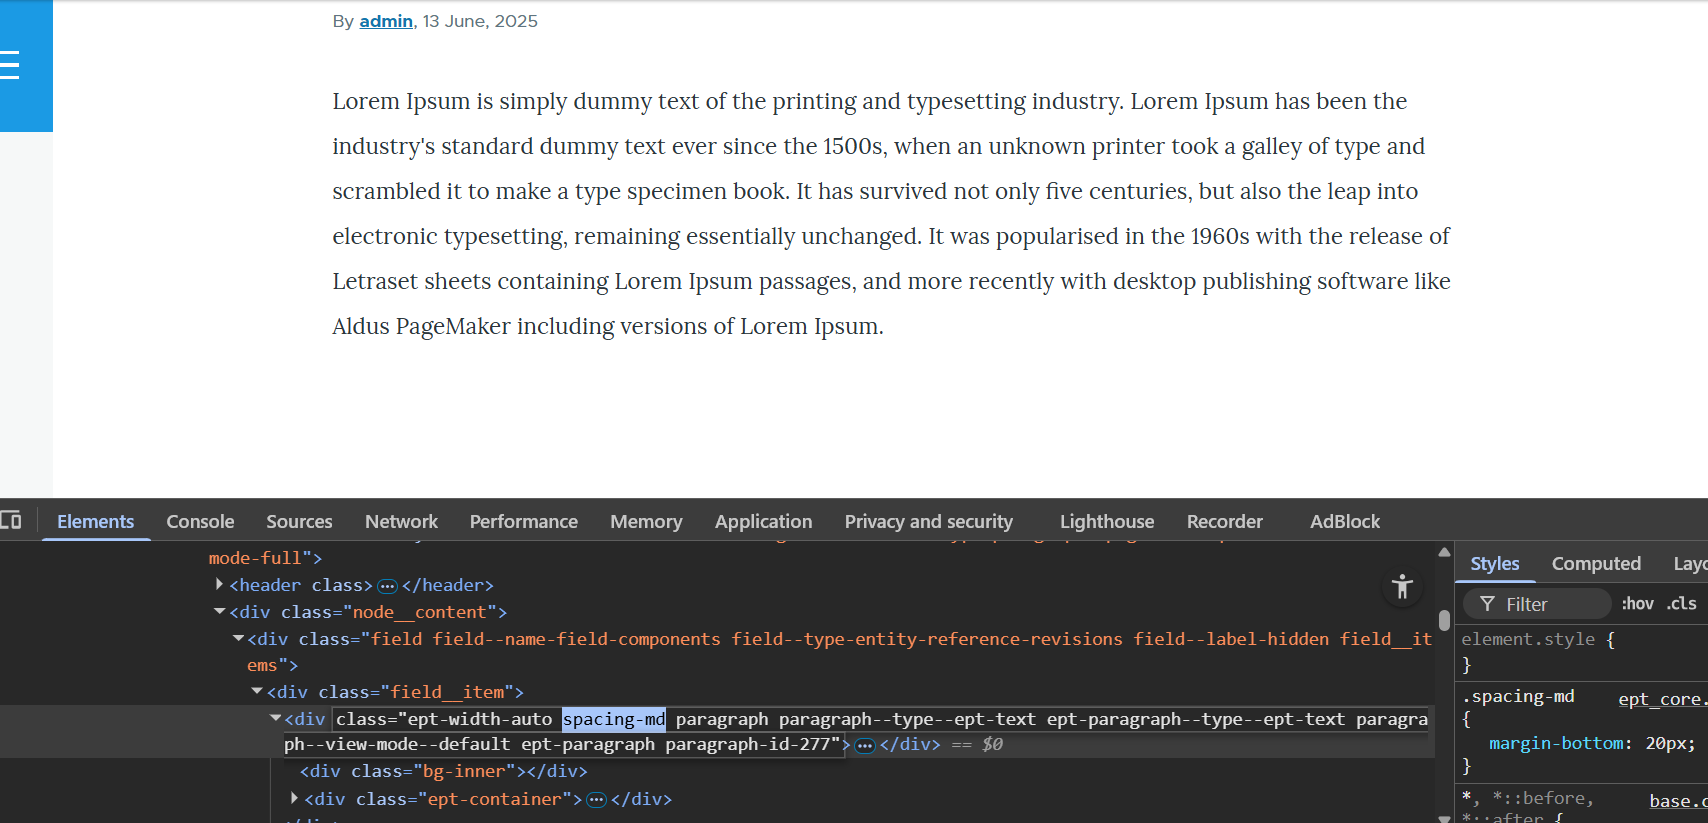
Spacing フィールドのキーをクラス名として渡し、CSS を使用してこれらのクラスに基づいた余白の値を定義します:
/ebt_core/scss/ept_core.scss
.spacing-sm {
  margin-bottom: 10px;
}

.spacing-md {
  margin-bottom: 20px;
}

.spacing-lg {
  margin-bottom: 30px;
}

.spacing-xl {
  margin-bottom: 40px;
}

.spacing-xxl {
  margin-bottom: 50px;
}
例えばコンテンツや body タグの任意のクラスを使用して、カスタム CSS ファイルで値を上書きできます:
body .spacing-sm {
  margin-bottom: 15px;
}
また、EBT 設定フィールドウィジェット用のカスタムクラスでスペーシングのリストを上書きすることもできます。
以上です。EBT ブロックの余白を設定する際に、DOM Box とシンプルなセレクトボックスのどちらかを選べるようになりました。
EBT モジュールについてご質問があれば、Drupal.org またはお問い合わせフォームでお尋ねください: