किसी Content Type में Basic Fields जोड़ना
लक्ष्य
Vendor content type में एक link field और एक image field जोड़ें।
कदम
Vendor content type में Vendor URL और Main image fields जोड़ें।
- Manage प्रशासनिक मेनू में, Structure > Content types (admin/structure/types) पर जाएँ। फिर Vendor content type के dropdown बटन में Manage fields पर क्लिक करें। Manage fields पेज दिखाई देगा। यहाँ से आप या तो content type के लिए एक नया field बना सकते हैं या किसी मौजूदा field को पुनः उपयोग कर सकते हैं। ध्यान दें कि installation profile द्वारा प्रदान किए गए content types और fields के नाम और विवरण इन पेजों पर अंग्रेज़ी में दिखाए जाते हैं; स्पष्टीकरण के लिए अनुभाग 2.7, “Concept: User Interface, Configuration, and Content translation” देखें।
-
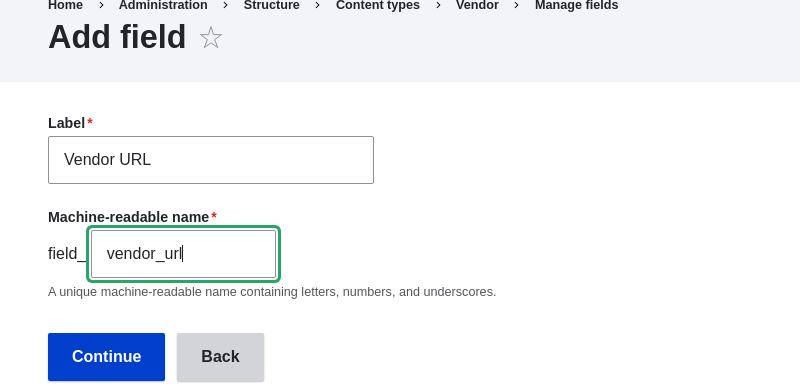
Create a new field पर क्लिक करें। Add field पेज दिखाई देगा।

- Choose a field type विकल्पों से Link field type चुनें। Continue पर क्लिक करें। Add field पेज field label कॉन्फ़िगर करने के लिए एक form के साथ दिखाई देगा।
-
नीचे दिखाए गए अनुसार fields भरें।
Field नाम व्याख्या मान Label
प्रशासनिक पेजों में दिखाई देने वाला Label
Vendor URL
Choose a type of field
Field type
Link
Label मान के आधार पर एक machine name स्वतः उत्पन्न होता है। यदि आप डिफ़ॉल्ट नाम को बदलना चाहते हैं तो Edit पर क्लिक करें।
-
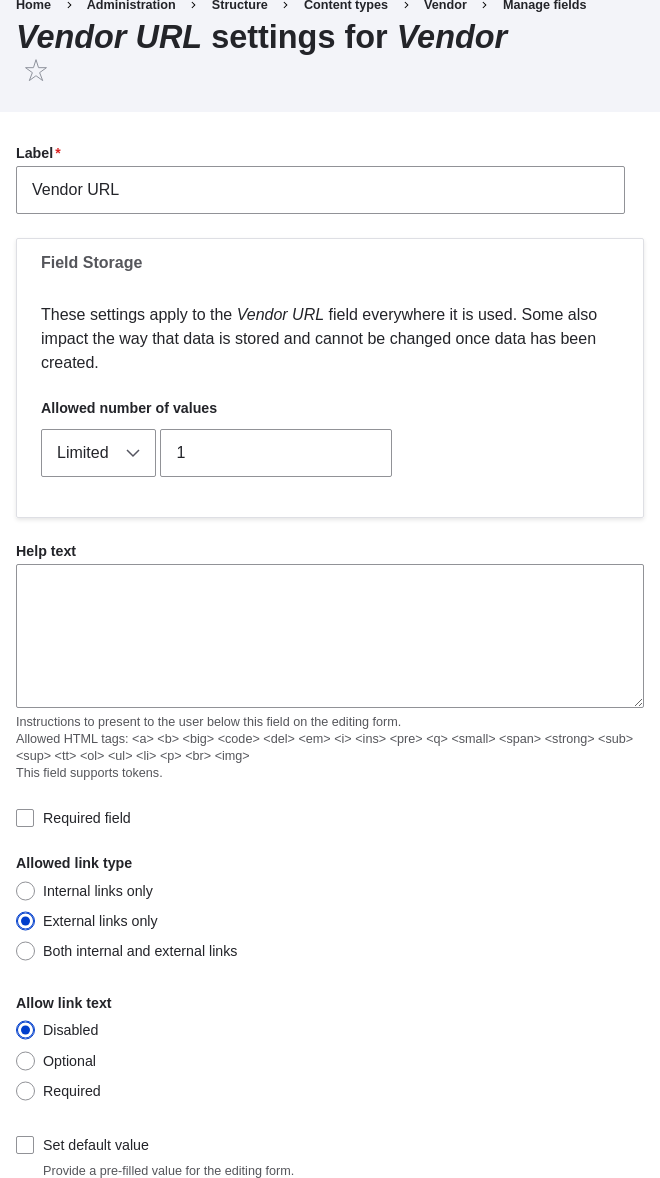
Continue पर क्लिक करें। Vendor URL settings for Vendor पेज दिखाई देगा जो field को कॉन्फ़िगर करने की अनुमति देता है। नीचे दिखाए गए अनुसार fields भरें।
Field नाम व्याख्या मान Label
कंटेंट फॉर्म में दिखाई देने वाला Label
Vendor URL
Allowed number of values
मानों की संख्या जो दर्ज की जा सकती है
Limited, 1
Help text
field के नीचे दिखाई जाने वाली निर्देशिका
(खाली छोड़ें)
Required field
क्या field आवश्यक है या नहीं
Unchecked
Allowed link type
किस प्रकार के लिंक दर्ज किए जा सकते हैं
केवल External links
Allow link text
क्या link text दर्ज किया जा सकता है
Disabled
- Save settings पर क्लिक करें। Vendor URL content type में जोड़ दिया गया है। अब Main image field बनाना जारी रखें।
- Create a new field पर क्लिक करें। Add field पेज दिखाई देगा।
- Choose a field type विकल्पों से File upload field type चुनें। Continue पर क्लिक करें। Add field पेज field label कॉन्फ़िगर करने के लिए एक form के साथ दिखाई देगा।
-
कुछ field प्रकारों के लिए sub-type का चयन करना आवश्यक होता है। नीचे दिखाए गए अनुसार fields भरें।
Field नाम व्याख्या मान Label
प्रशासनिक पेजों में दिखाई देने वाला Label
Main image
नीचे एक विकल्प चुनें
Field sub-type
Image
-
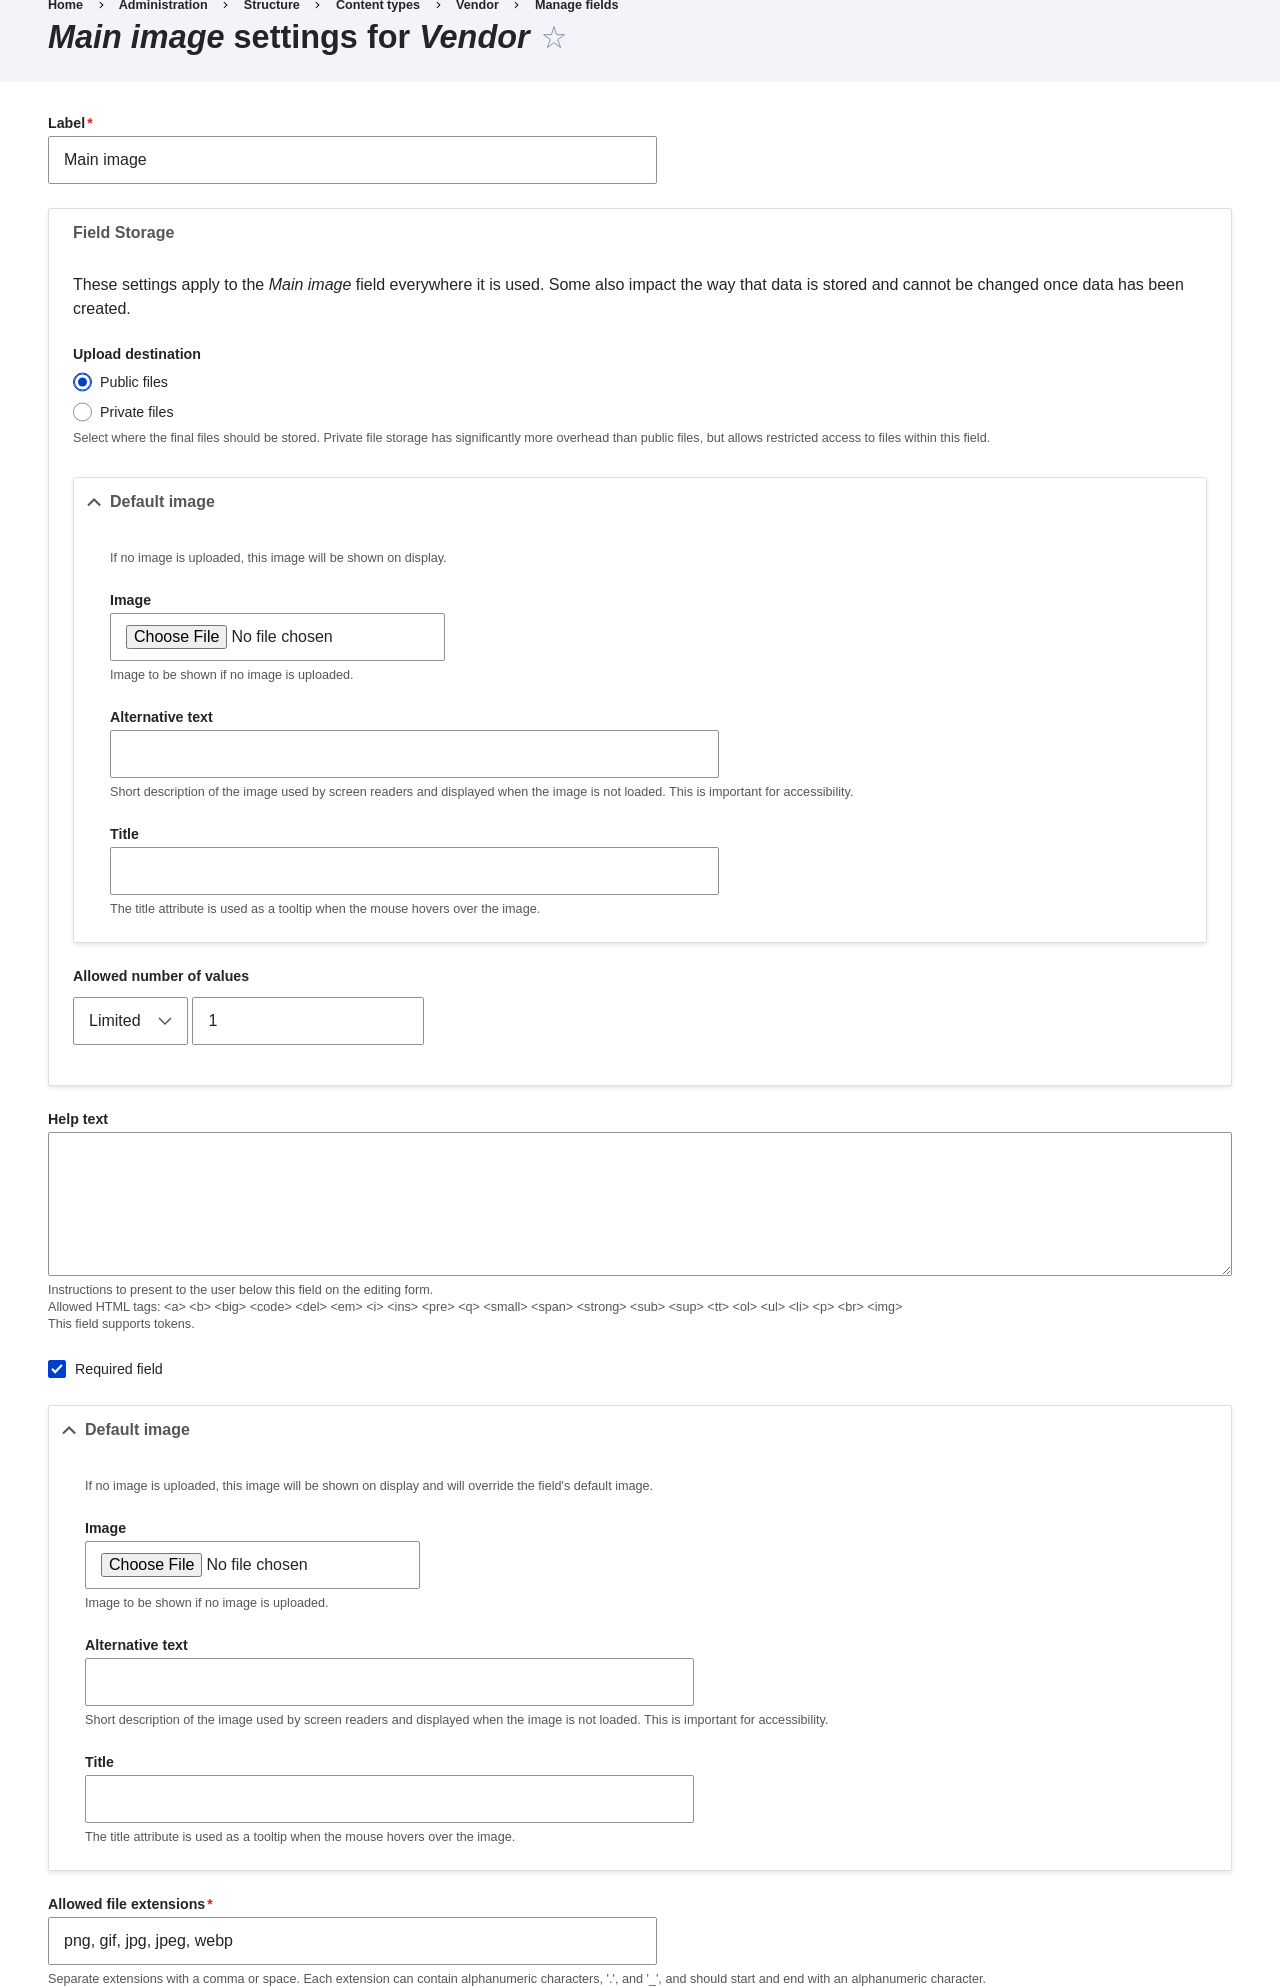
Continue पर क्लिक करें। Vendor के लिए Main image settings पेज दिखाई देगा। नीचे दिखाए गए अनुसार fields भरें।
Field नाम व्याख्या मान Label
कंटेंट फॉर्म में दिखाई देने वाला Label
Main image
Allowed number of values
मानों की संख्या जो दर्ज की जा सकती है
Limited, 1
Default image
आप यहाँ एक डिफ़ॉल्ट इमेज सेट कर सकते हैं। यह तब उपयोग होगा जब आप Vendor content item बनाते समय कोई इमेज प्रदान नहीं करेंगे।
(खाली छोड़ें)
Help text
field के नीचे दिखाई जाने वाली निर्देशिका
(खाली छोड़ें)
Required field
क्या field आवश्यक है या नहीं
Checked
Allowed file extensions
किस प्रकार की इमेज अपलोड की जा सकती है
png, gif, jpg, jpeg
File directory
वह डायरेक्टरी जहाँ फाइलें स्टोर होंगी। एक file directory मान देने से आप सुनिश्चित करते हैं कि Main image field के माध्यम से अपलोड की गई सभी इमेज एक ही डायरेक्टरी में होंगी।
vendors
Minimum image dimensions
अपलोड की गई इमेज का न्यूनतम आकार
600 x 600
Maximum upload size
अपलोड की गई इमेज का अधिकतम आकार
5 MB
Enable Alt field
क्या वैकल्पिक text दर्ज किया जा सकता है
Checked
Alt field required
क्या वैकल्पिक text आवश्यक है
Checked
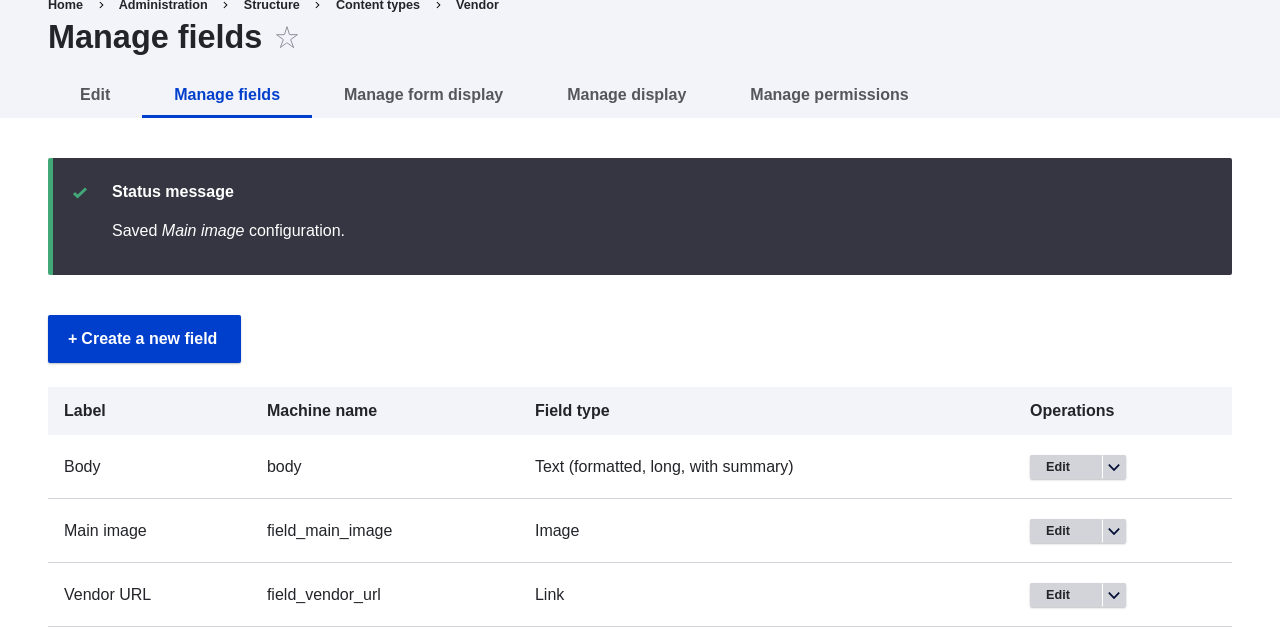
-
Save settings पर क्लिक करें। Main image content type में जोड़ दिया गया है।
-
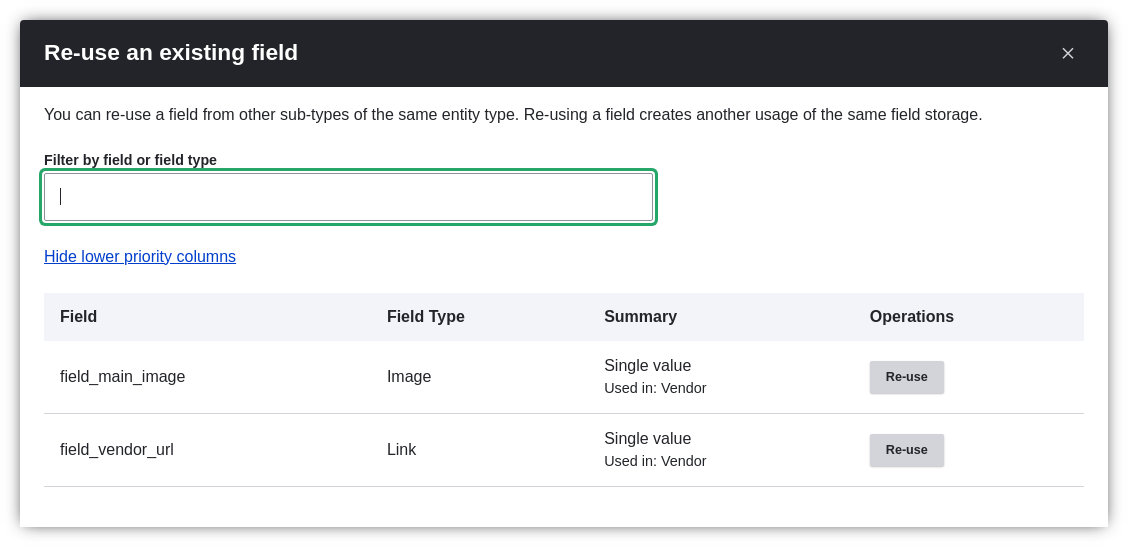
Recipe content type में समान चरणों का उपयोग करते हुए Main image field जोड़ें। Recipe content type के Manage Fields पेज पर जाएँ। फिर Re-use an existing field बटन का उपयोग करें, modal dialog खोलें और तालिका में Main image field से संबंधित Re-use बटन दबाएँ। फिर step 7 पर जाएँ और शेष चरणों का पालन करें।
- दो Vendor content items बनाएँ (देखें अनुभाग 5.2, “Creating a Content Item”) जिनका नाम "Happy Farm" और "Sweet Honey" हो। सुनिश्चित करें कि उनमें images और URLs शामिल हों।
वीडियो
लेख Drupal User Guide से। Sree Veturi, Boris Doesborg, और Joe Shindelar द्वारा Drupalize.Me पर लिखा गया।