创建新的 EPT 模块
创建新 EPT 模块的最简单方式是使用 Drush 命令(适用于 Drush 12+)。要使用此命令,你需要启用 EPT Core Starterkit 模块:
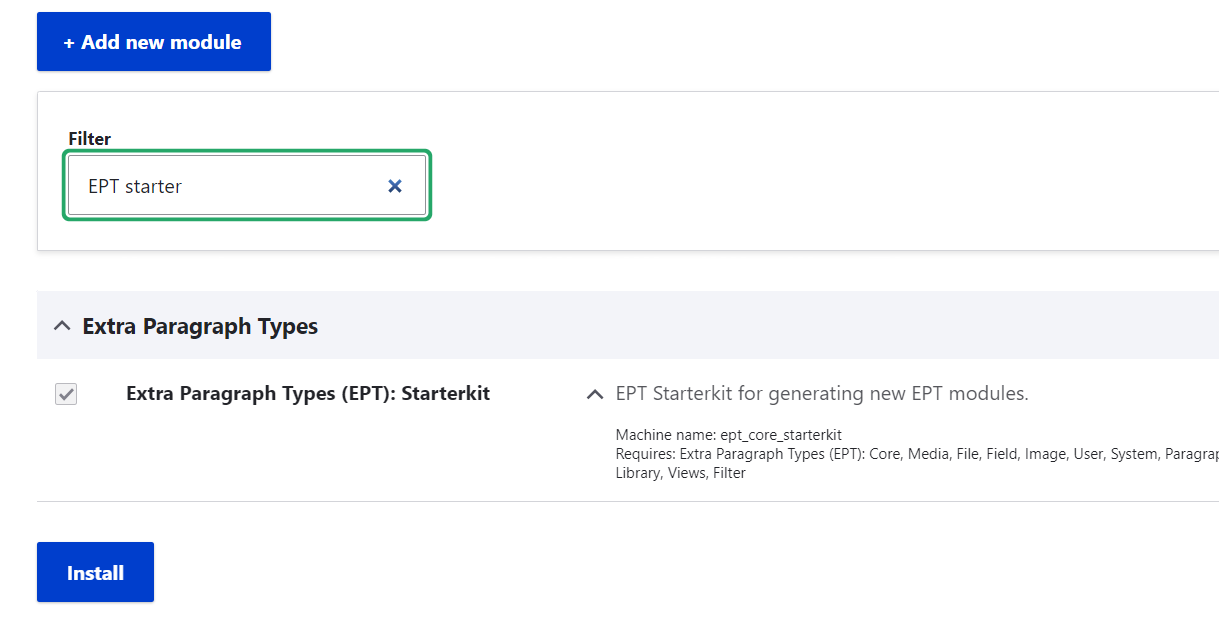
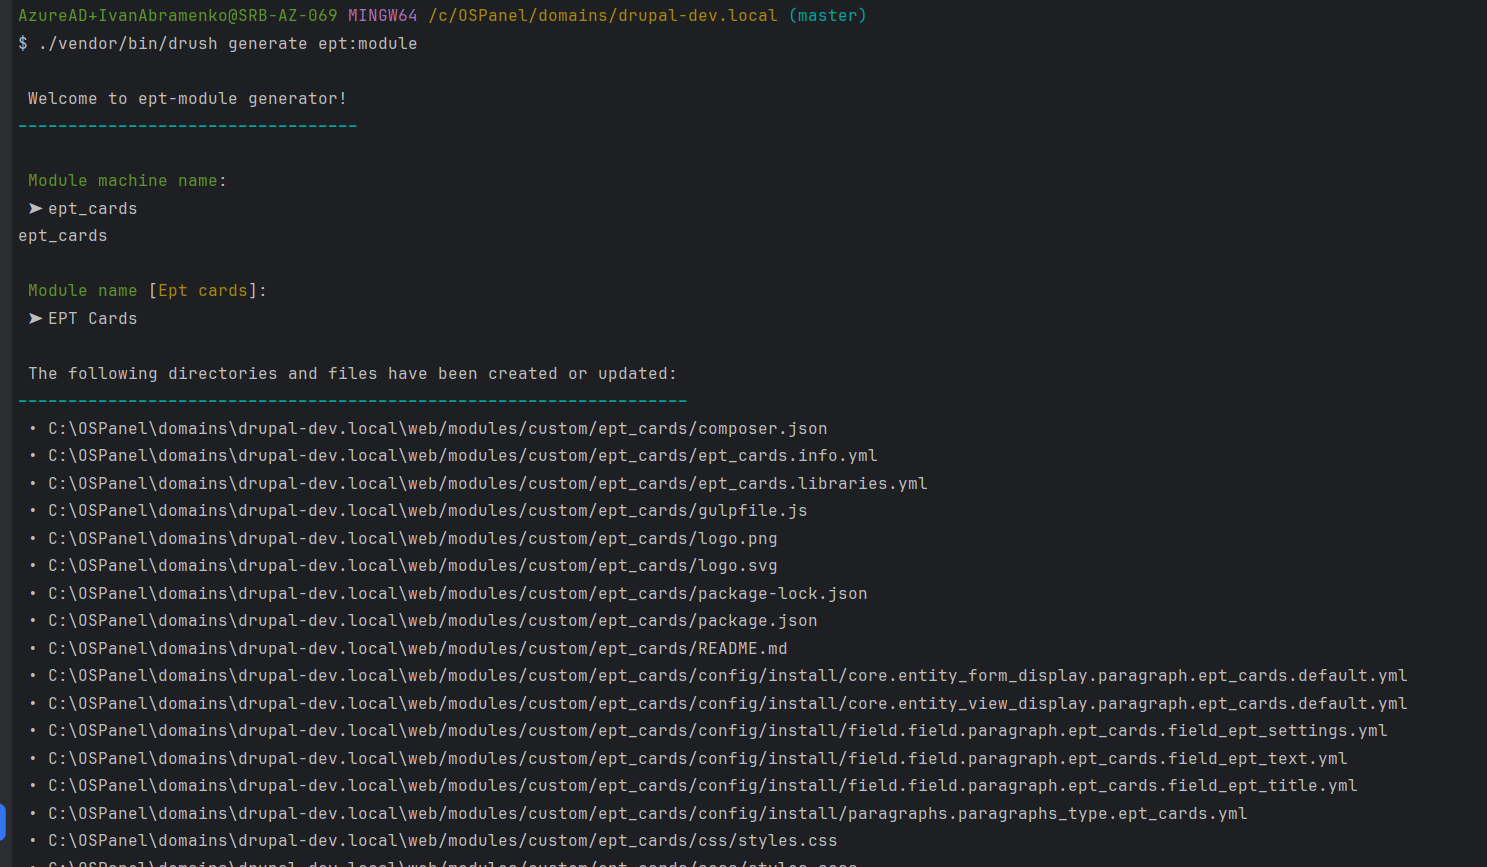
之后即可使用 EPT 模块生成器:
drush generate ept:module
机器名称需要以 ept_* 前缀开头,这是所有 EPT 模块正常工作的必要条件。
你也可以在 EPT Core 模块文件夹中使用 EPT Starterkit。只需将文件中的所有 ept_starterkit 重命名为新 EPT 模块的机器名称。
https://www.drupal.org/project/ept_core
或者复制 EPT Text 模块并替换其中的机器名称。
https://www.drupal.org/project/ept_text
因为它是最简单的 EPT 模块,并且包含了所有基础 EPT 设置。

逐步创建 EPT 模块
(部分截图可能来自 EBT 倒计时模块)
复制现有的 EPT Text 模块或 EPT Kickstarter 模块作为模板,或者使用 drush generate ept:module 命令。
复制现有的 EPT Text 模块或 EPT Kickstarter 模块作为模板,或者使用 drush generate ept:module 命令。
EPT Text 模块包含以下文件夹:
/ept_text/config/install — 包含 EPT Text 段落类型和字段实例的配置。其他 EPT 模块可能包含段落类型和字段存储的配置。
/ept_text/templates — 包含段落的 paragraph--ept-text--default.html.twig 模板。
/ept_text/tests — 包含 EPT 模块的测试,目前仅有一个安装测试。
以及其他标准的 Drupal 模块文件:composer.json、ept_text.info.yml、readme.md。关于创建自定义 Drupal 模块的更多细节可以在官方文档中找到:
https://www.drupal.org/docs/develop/creating-modules
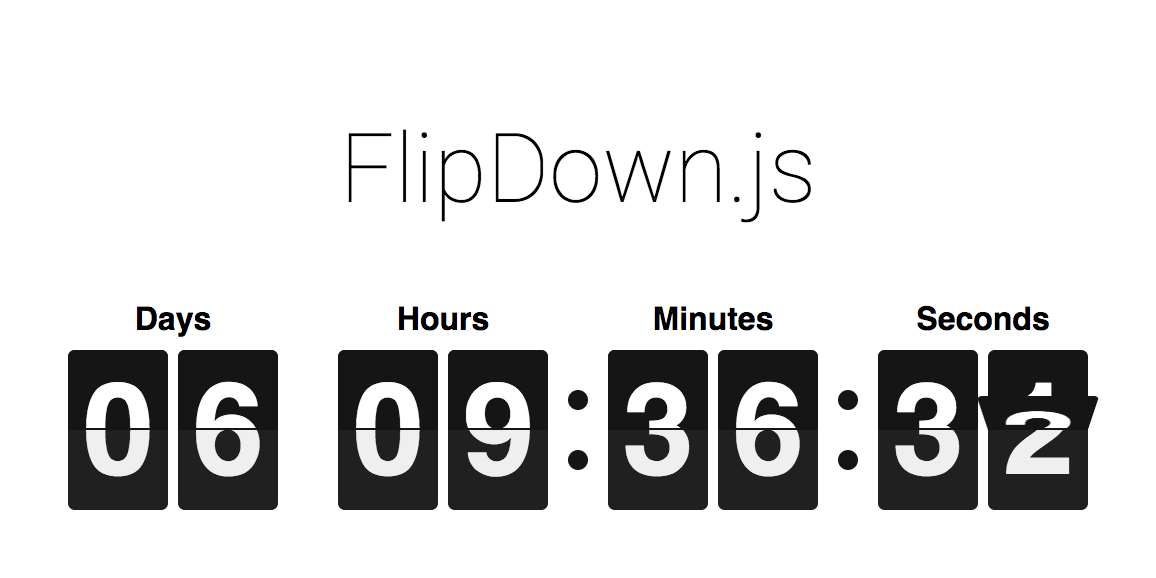
我将创建一个新的 EPT Countdown 模块,它将使用以下 JavaScript 插件 — FlipDown:
https://github.com/PButcher/flipdown
在 GitHub 上 fork 该仓库并提交到 Packagist。
在 GitHub 上 fork 该仓库并提交到 Packagist。
所有第三方库必须在 GitHub 上进行 fork 并托管到 Packagist,例如:
https://packagist.org/packages/levmyshkin/flexslider
来源:
https://github.com/levmyshkin/flexslider
这样 Composer 就能像常规库一样从 Packagist 加载它们。这些第三方库必须在 composer.json 中包含字段 "type": "drupal-library",随后它们将默认安装到 /libraries 文件夹:
https://github.com/levmyshkin/flexslider/blob/master/composer.json

让我们在 GitHub 上 fork FlipDown 仓库。
通常不建议通过 fork 仓库来替代使用原始来源。不过,我认为这样做能更方便地使用 EPT 模块,而无需手动编辑 composer.json。想象一下,对初学者来说,安装 Composer、手动修改 composer.json 并正确填写外部仓库 URL 有多困难。将自己的库发布到 Packagist 可以简化安装。因此,最好把所有第三方库都托管到 Packagist。

在 fork 后的 GitHub 页面上,你可以重命名仓库。名称应当简洁,不要使用大写字母或特殊字符。允许使用连字符(-)和下划线(_)。
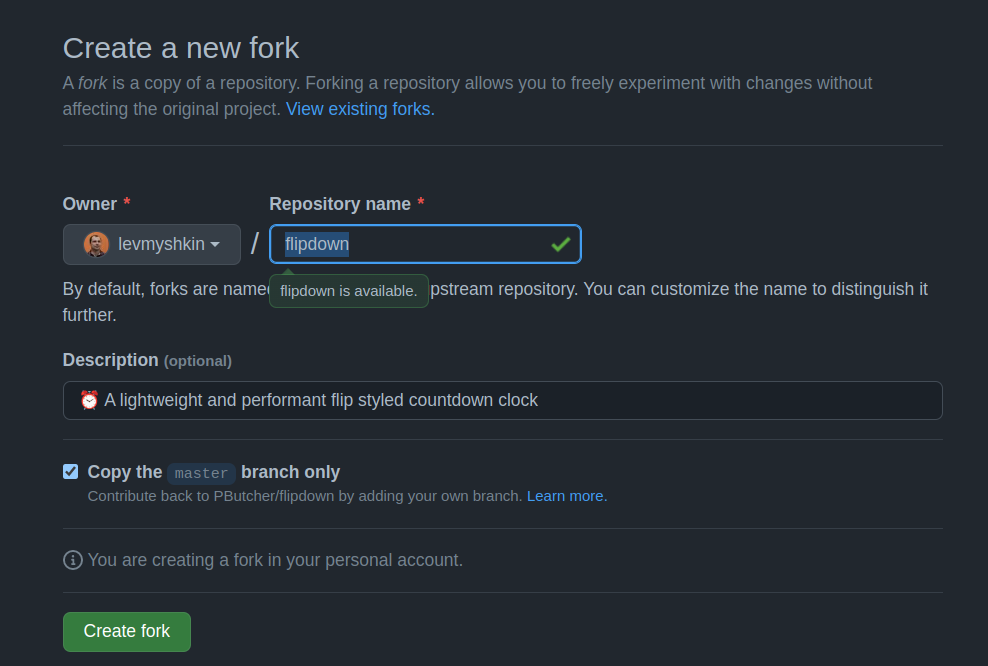
现在我们有了一个新仓库:
https://github.com/levmyshkin/flipdown
让我们添加一个 composer.json 文件,并将 type 设置为 "drupal-library":
git add composer.json
git commit -m 'Add Composer.json file'
git push origin master
composer.json 文件可在此处查看:
https://github.com/levmyshkin/flipdown/blob/master/composer.json
如果你查看仓库当前的标签,会发现还没有:
git tag
![]()
我通常会跟随原始库的版本。如果最新版本是 1.4.6,我会将次版本号提升到 1.4.7。由于 FlipDown 没有标签,我创建了版本 1.0.0:
git tag 1.0.0
git push origin 1.0.0
需要打标签,因为它包含了带有 "type": "library" 的 composer.json。
为什么不直接把 JS 库复制到模块里?
你只能复制使用 GPL 许可的库。JavaScript 库通常使用 MIT 许可。从技术上说可行,但 Drupal.org 的规则不允许这么做:
https://www.drupal.org/about/licensing
现在把 FlipDown 库发布到 Packagist:
https://packagist.org/packages/submit
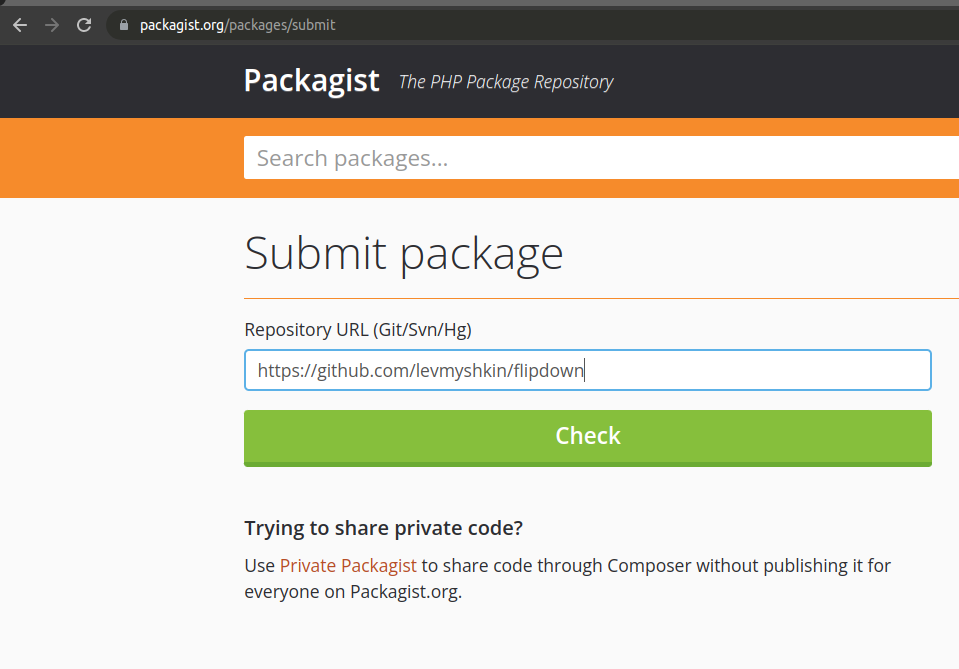
如果你在发布前忘了添加带有 "type": "drupal-library" 的 composer.json——也没关系。只需补充该文件并创建一个新标签,Packagist 会自动抓取更新。
这是该库在 Packagist 上的页面:
https://packagist.org/packages/levmyshkin/flipdown

请确保库页面中显示的类型为 drupal-library。
现在回到我们的 Drupal 文件中,复制 ept_text 文件夹;我把新模块命名为 ept_countdown:
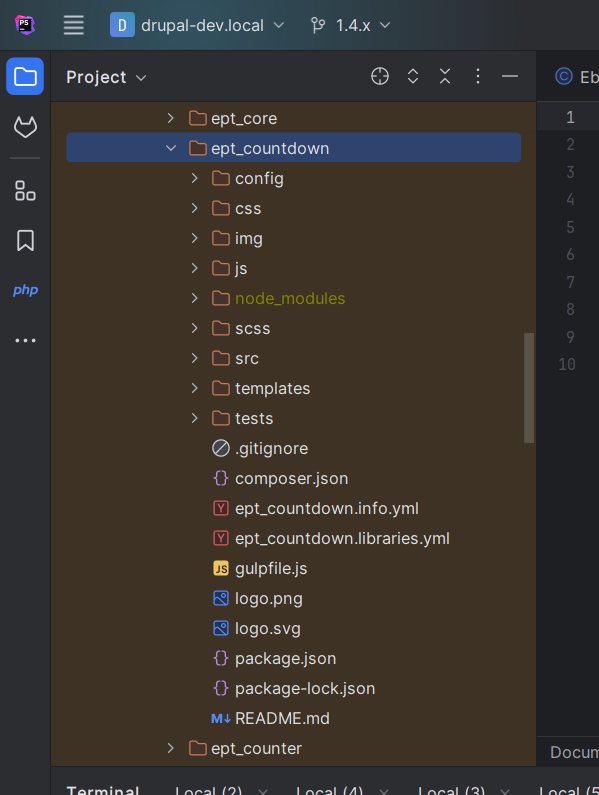
需要执行以下步骤:
- 删除 /config/install 下的配置——我们稍后会导出新的配置。
- 将所有出现的 ept_text 替换为 ept_countdown。
- 重命名文件,将 “text” 替换为 “countdown”。
- 更新 ept_countdown.info.yml 和 README.md 中的模块描述。
我会在 Git 中将每一步分别提交,这样你就可以逐步跟踪更改:
git clone https://git.drupalcode.org/project/ept_countdown.git
现在我们已经有了模块的模板,可以向 Drupal.org 提交更改了。
在 Drupal.org 上创建一个模块项目。
在 Drupal.org 上创建一个模块项目。
让我们进入 drupal.org 的项目创建页面:
https://www.drupal.org/node/add
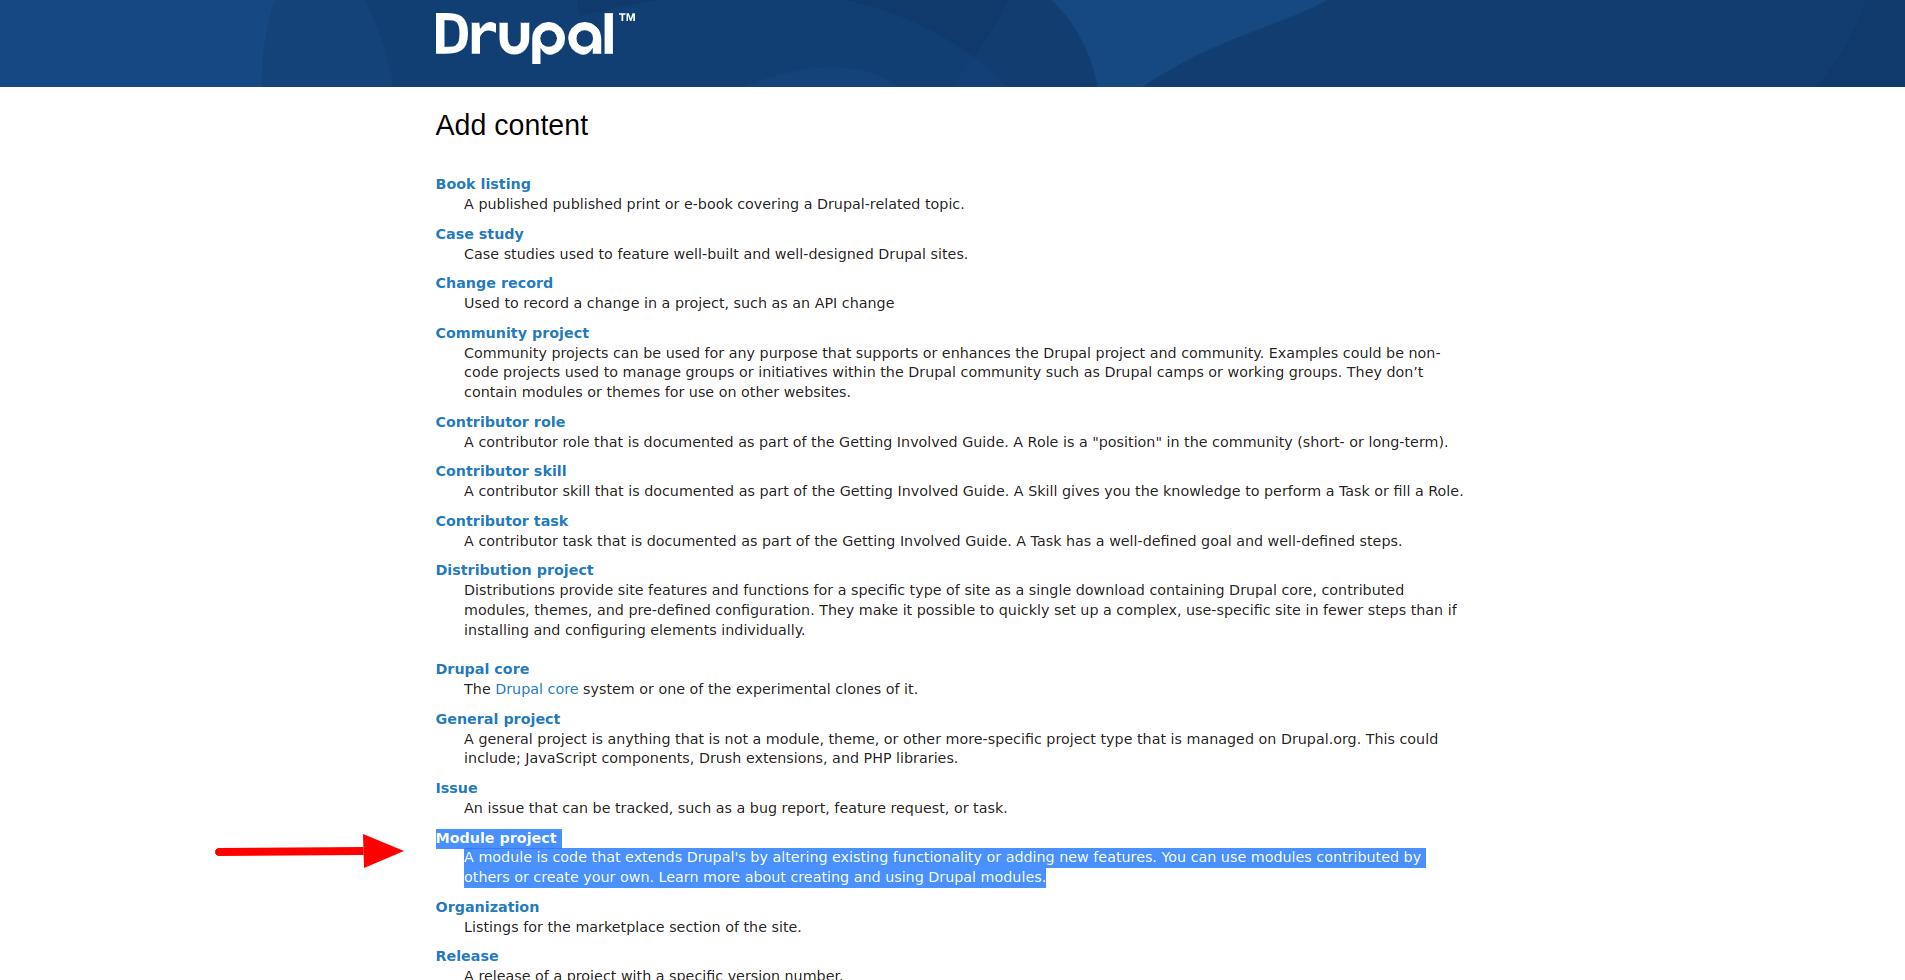
我们需要添加一个类型为模块的项目:
https://www.drupal.org/node/add/project-module
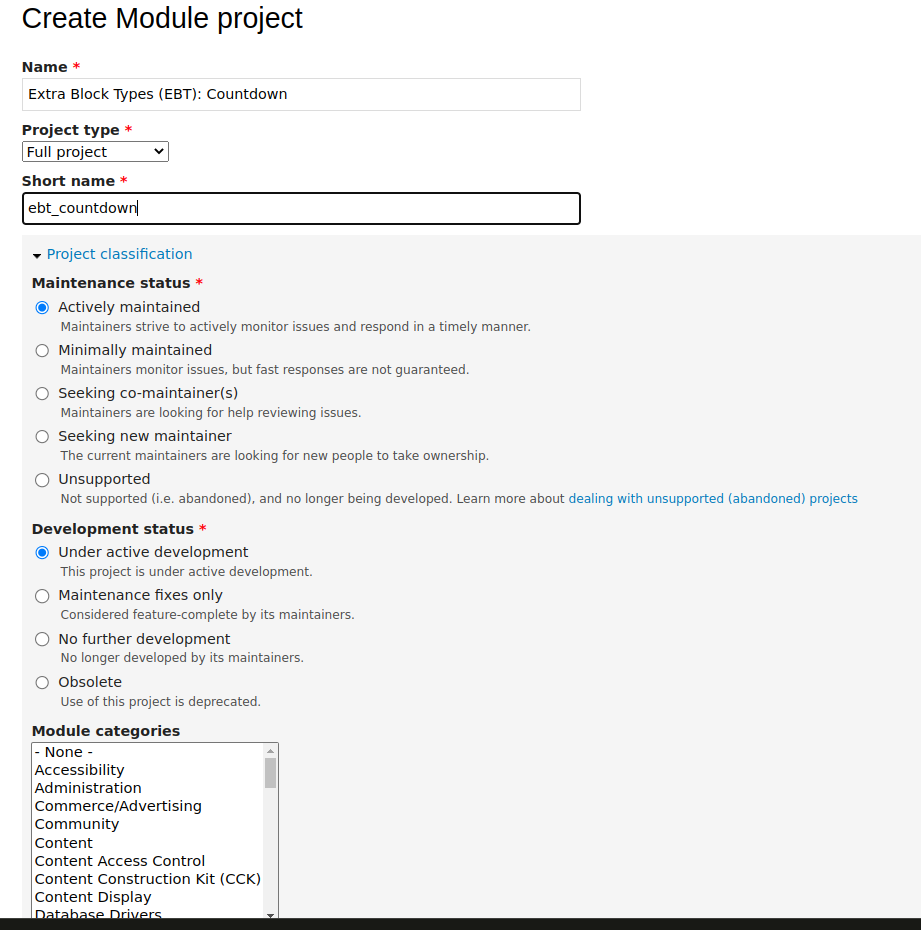
标题:Extra Paragraph Types (EPT): Countdown
项目类型:完整项目
简短名称:ept_countdown
维护状态:积极维护
开发状态:正在积极开发
模块分类:内容,内容显示
生态系统:Extra Paragraph Types (EPT): Core
在 描述 字段中,我通常会插入可用 EPT 模块的完整列表(参见上方 Markdown 示例)。
现在我们在 Drupal.org 上有了一个模块项目页面:
https://www.drupal.org/project/ept_countdown
在版本控制(Version Control)选项卡中,你可以找到如何将远程仓库添加到本地 Git 项目的说明:
https://www.drupal.org/project/ept_countdown/git-instructions
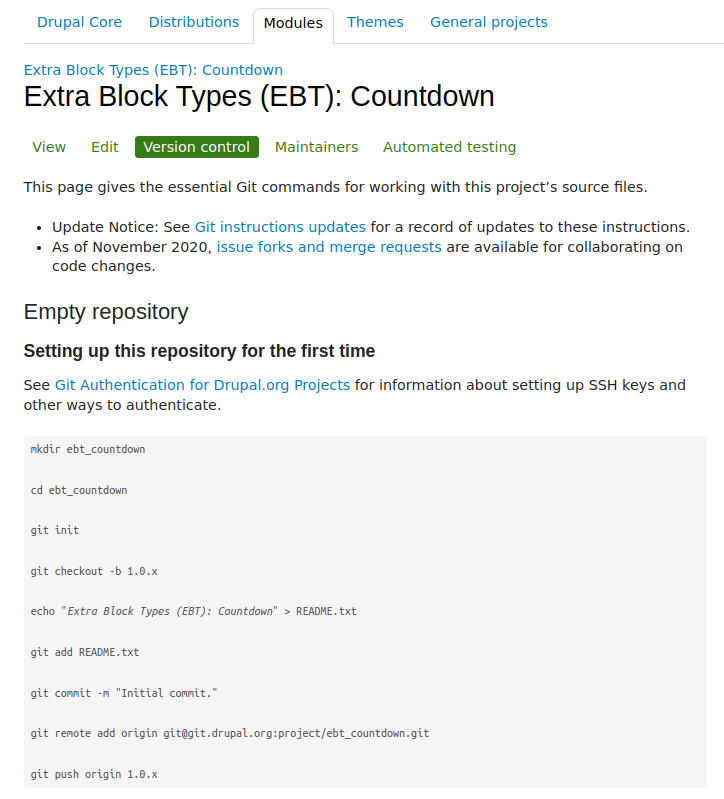
在初始提交后,你需要创建一个与其他 EPT 模块主要版本一致的新分支 —— 当前是 1.4.x。
现在我们可以开始为模块添加新功能。这个过程与开发自定义模块类似:我们将创建一个段落类型,添加字段,并引入 CSS/JS 资源。
EPT 倒计时功能开发入门
步骤 1. 创建 EPT Countdown 段落类型。
如果你是使用 Drush 生成的模块,只需安装该模块即可。
EPT 倒计时功能开发入门
步骤 1. 创建 EPT Countdown 段落类型。
如果你是使用 Drush 生成的模块,只需安装该模块即可。
如果你是使用 Drush 生成的模块,只需安装该模块即可。
首先,你需要创建一个新的段落类型 EPT Countdown:
/admin/structure/paragraphs_type/add
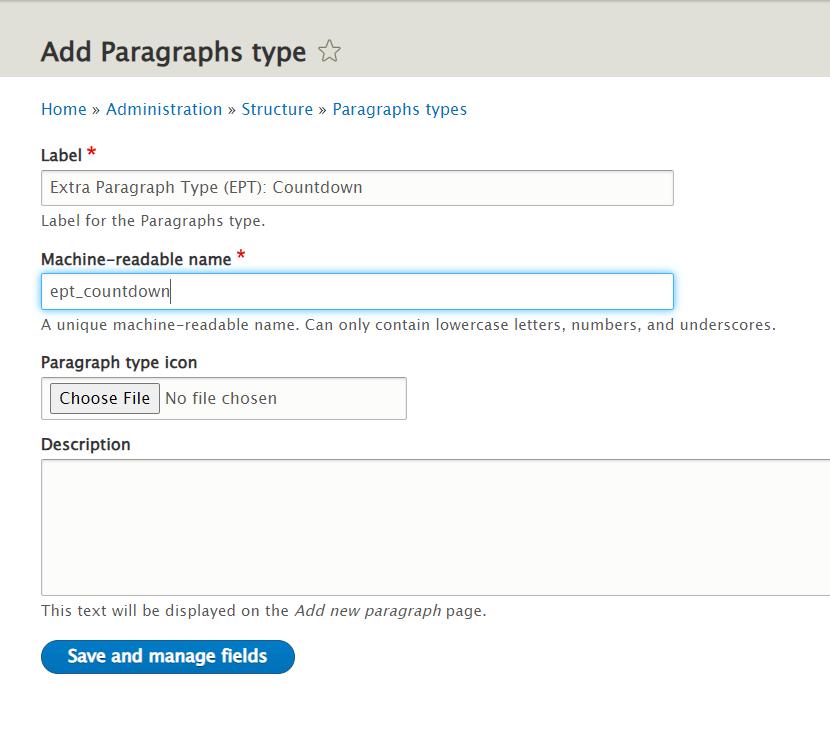
确保机器名称以 ept_ 开头。我通常会以 EPT 开始段落名称 —— 这样机器名称会自动正确生成。机器名称是否需要与模块名称一致?是的,推荐保持一致,以避免与其他 EPT 模块冲突。这对于在模块中覆盖模板而不是在主题中覆盖模板也很重要 —— 参见 ept_core 模块中的 ept_core_theme_registry_alter() 函数。
现在添加字段 EPT Settings: field_ept_settings —— 这是所有 EPT 模块所必需的字段:
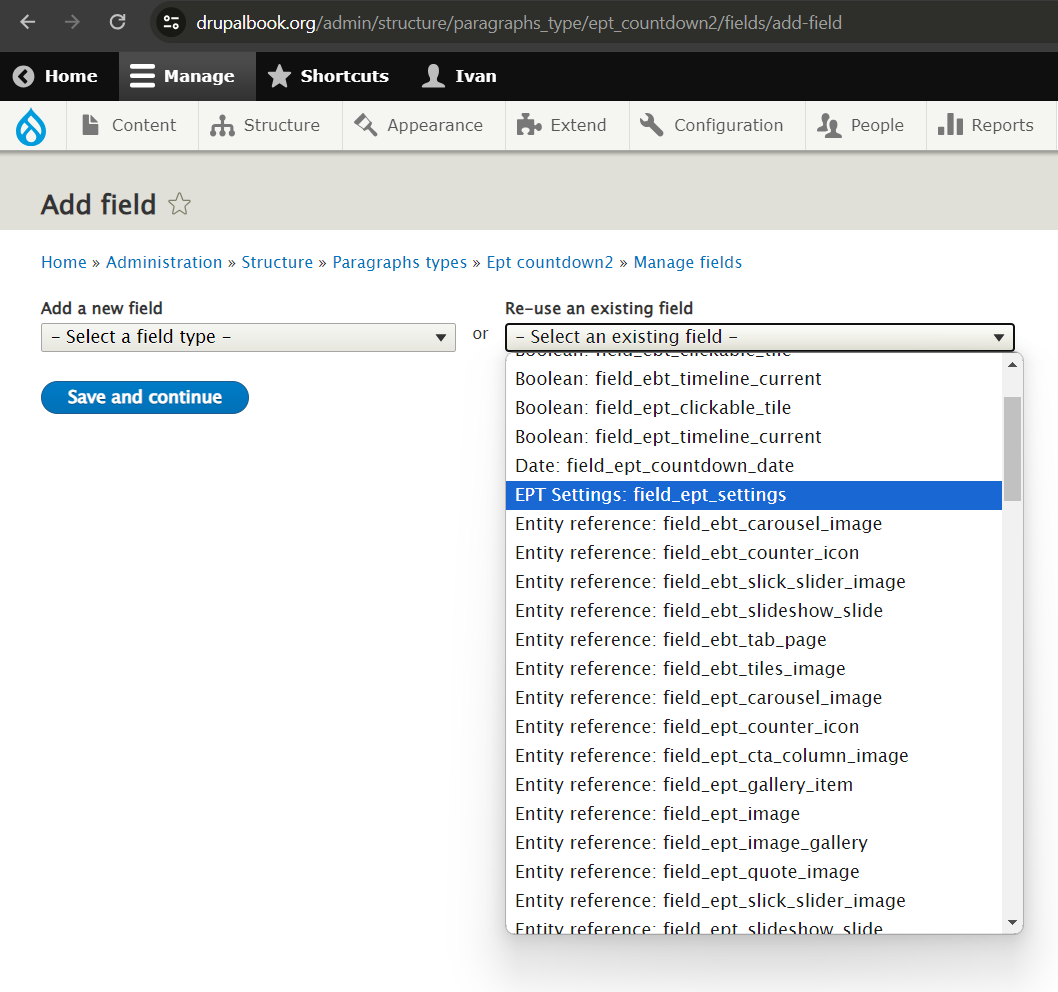
EPT Settings 是来自 EPT Core 模块的共享字段;它提供了 DOM Box、背景、间距和宽度的设置。
由于我们需要倒计时到某个日期,因此需要添加一个日期/时间字段:
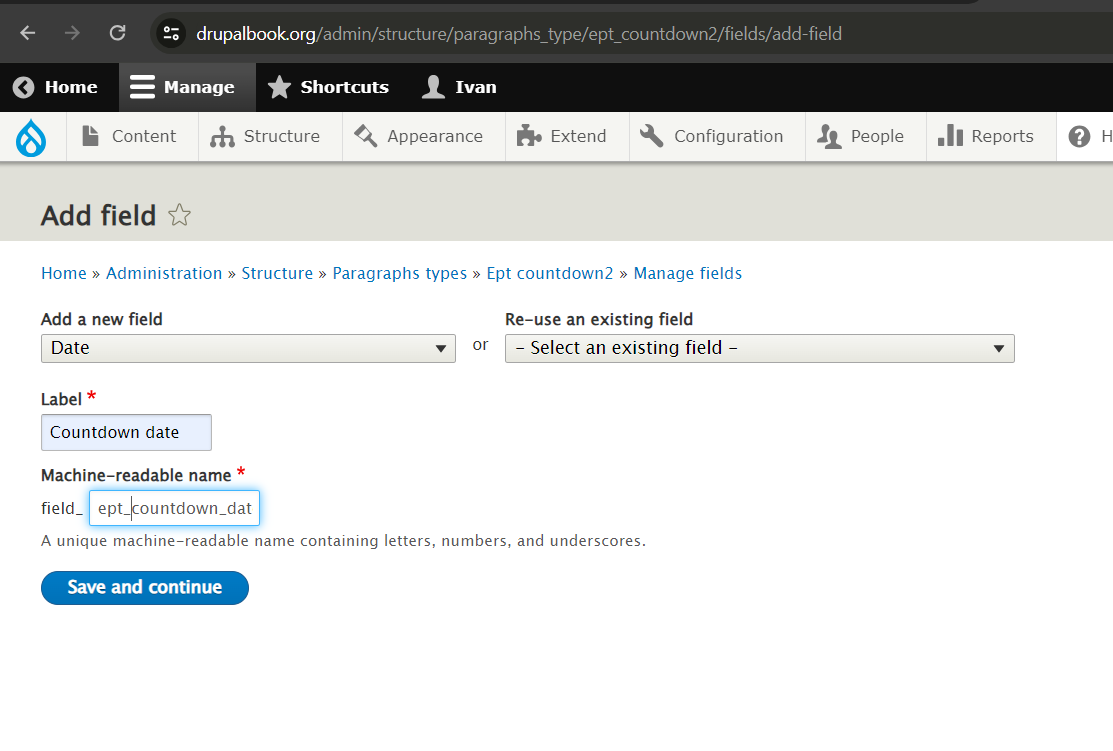
我在机器名称中添加了 ept_ 前缀,但这不是必须的。你也可以将其命名为 field_countdown_date。我们还拥有默认的 body 和 title 字段 —— 这对倒计时段落来说已经足够了。
对于 EPT 模块,我们通常在编辑表单中使用水平选项卡:
这不是必需的,但将内容与设置分开会更方便,特别是当设置较多时。
父组应设置为 Tabs,方向选择 Horizontal,并将 Width Breakpoint 参数设置为 120(或任何其他较小的值):

现在我们已经有了段落类型,启用 EPT Countdown 模块以应用模板:
/admin/modules

在所需的内容类型中启用带有段落字段的 EPT Countdown 段落:
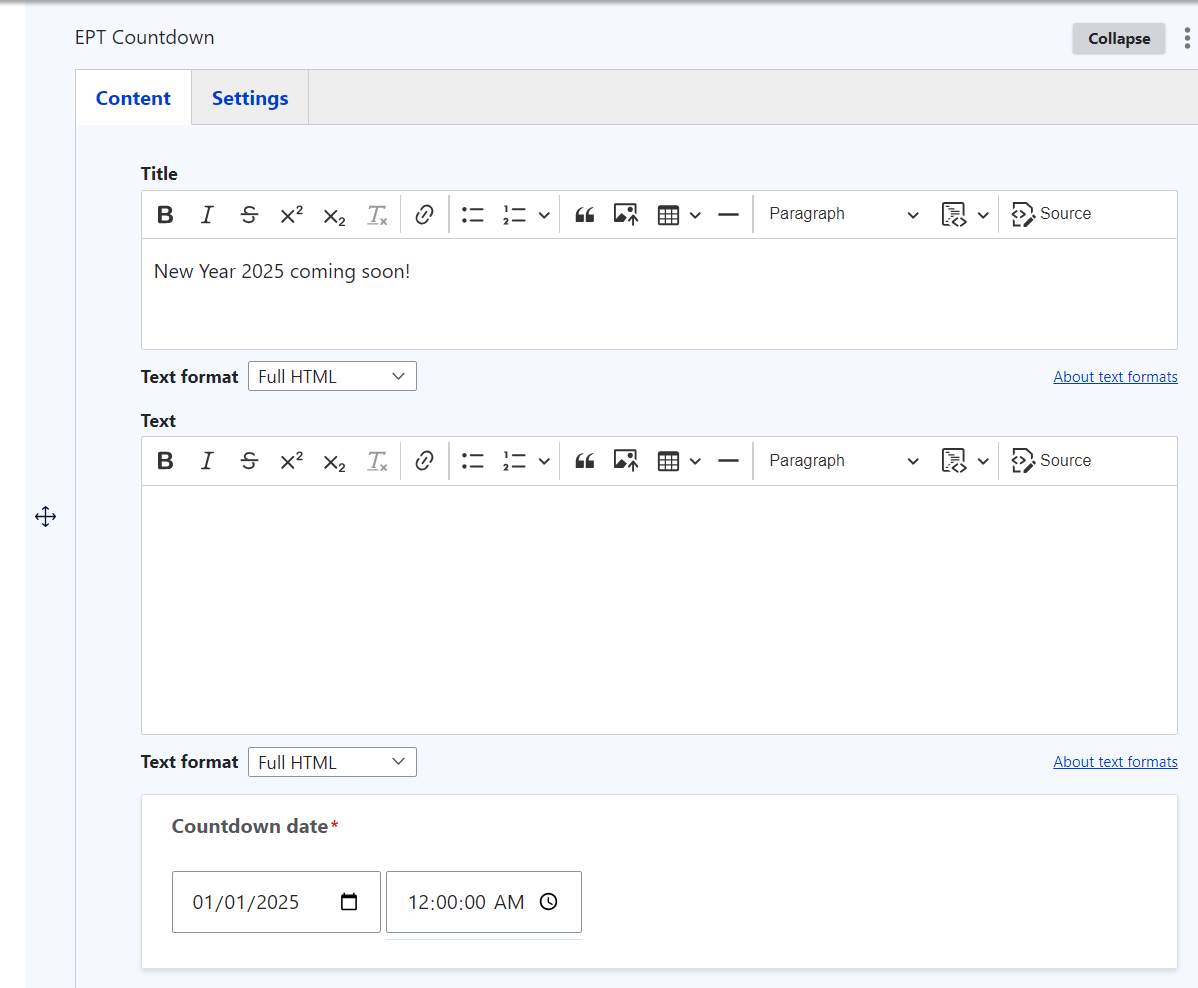
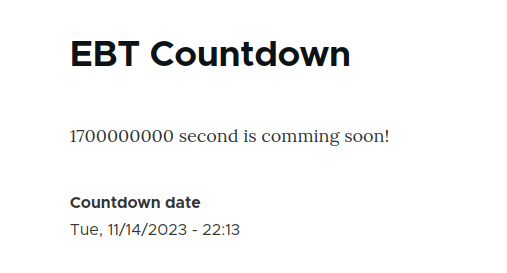
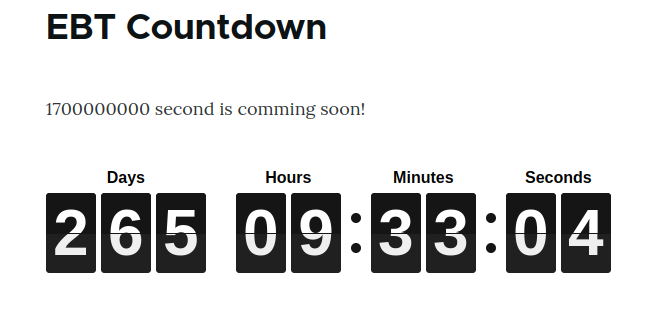
以下是在页面上的效果:
步骤 2. 在 EPT 模块中连接第三方库
步骤 2. 在 EPT 模块中连接第三方库
现在我们可以连接一个第三方库。我们已经在 composer.json 中列出了 levmyshkin/flipdown 库,但由于这是一个自定义模块,我们需要通过 Composer 手动安装该库:
composer require levmyshkin/flipdown
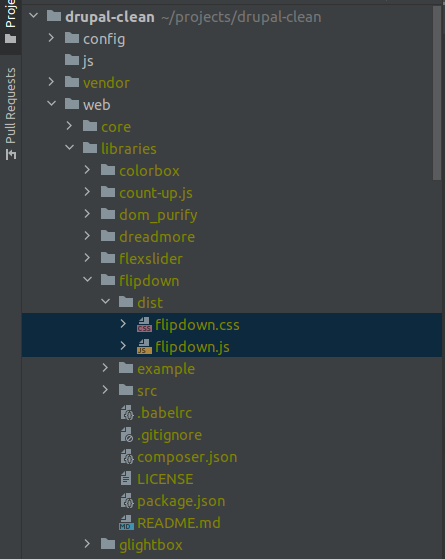
该库会自动安装到 /libraries 文件夹中:
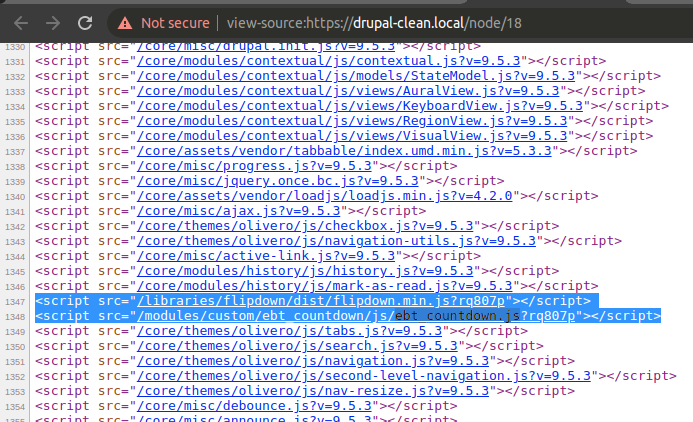
现在创建 ept_countdown.libraries.yml 文件并注册 FlipDown 的 CSS/JS 库,以及一个自定义 JS 文件 ept_flipdown/js/ept_countdown.js,稍后将在其中初始化 FlipDown 插件:
ept_countdown.libraries.yml:
ept_countdown:
  css:
    component:
      /libraries/flipdown/dist/flipdown.min.css: { minified: true }
  js:
    /libraries/flipdown/dist/flipdown.min.js: { minified: true }
    js/ept_countdown.js: {}
  dependencies:
    - core/once
    - core/drupalSettings
对于 /libraries 文件夹中的文件,我们使用以斜杠开头的绝对路径。
js/ept_countdown.js:
(function ($, Drupal) {

  /**
   * EBT Countdown 行为。
   */
  Drupal.behaviors.eptCountDown = {
    attach: function (context, settings) {

    }
  };

})(jQuery, Drupal);
我们还需要在段落模板中附加 ept_countdown 库。别忘了我们有两个模板:
{{ attach_library('ept_countdown/ept_countdown') }}

清理缓存并验证页面上是否加载了 JavaScript 文件:
我们将通过 drupalSettings 将日期从 PHP 传递到 JavaScript。这就是为什么我们在 ept_countdown.libraries.yml 文件中扩展并添加以下依赖项:
  dependencies:
    - core/once
    - core/drupalSettings
步骤 3. 为 EPT 设置连接自定义字段小部件并将变量传递到 JavaScript
步骤 3. 为 EPT 设置连接自定义字段小部件并将变量传递到 JavaScript
在 EPT 模块中,默认设置不会传递到 JavaScript。要启用此功能,我们需要重写字段小部件类 EptSettingsDefaultWidget:
文件: ept_countdown/src/Plugin/Field/FieldWidget/EptSettingsCountDownWidget.php
<?php

namespace Drupal\ept_countdown\Plugin\Field\FieldWidget;

use Drupal\Core\Field\FieldItemListInterface;
use Drupal\Core\Form\FormStateInterface;
use Drupal\ept_core\Plugin\Field\FieldWidget\EptSettingsDefaultWidget;

/**
 * Plugin implementation of the 'ept_settings_countdown' widget.
 *
 * @FieldWidget(
 *   id = "ept_settings_countdown",
 *   label = @Translation("EPT Countdown settings"),
 *   field_types = {
 *     "ept_settings"
 *   }
 * )
 */
class EptSettingsCountDownWidget extends EptSettingsDefaultWidget {

  public function formElement(FieldItemListInterface $items, $delta, array $element, array &$form, FormStateInterface $form_state) {
    $element = parent::formElement($items, $delta, $element, $form, $form_state);

    $element['ept_settings']['pass_options_to_javascript'] = [
      '#type' => 'hidden',
      '#value' => TRUE,
    ];

    $element['ept_settings']['color_theme'] = [
      '#title' => $this->t('Color theme'),
      '#type' => 'radios',
      '#options' => [
        'dark' => $this->t('Dark'),
        'light' => $this->t('Light'),
      ],
      '#default_value' => $items[$delta]->ept_settings['color_theme'] ?? 'dark',
      '#description' => $this->t('Select color theme for countdown'),
      '#weight' => '3',
    ];

    $element['ept_settings']['styles'] = [
      '#title' => $this->t('Styles'),
      '#type' => 'radios',
      '#options' => [
        'default' => $this->t('Default'),
        'new_year' => $this->t('New Year'),
      ],
      '#default_value' => $items[$delta]->ept_settings['styles'] ?? 'default',
      '#description' => $this->t('Select special style for countdown'),
      '#weight' => '4',
    ];

    $element['ept_settings']['heading_days'] = [
      '#title' => $this->t('Heading Days'),
      '#type' => 'textfield',
      '#default_value' => $items[$delta]->ept_settings['heading_days'] ?? $this->t('Days'),
      '#description' => $this->t('Header for Days counter'),
      '#weight' => '5',
    ];

    $element['ept_settings']['heading_hours'] = [
      '#title' => $this->t('Heading Hours'),
      '#type' => 'textfield',
      '#default_value' => $items[$delta]->ept_settings['heading_hours'] ?? $this->t('Hours'),
      '#description' => $this->t('Header for Hours counter'),
      '#weight' => '6',
    ];

    $element['ept_settings']['heading_minutes'] = [
      '#title' => $this->t('Heading Minutes'),
      '#type' => 'textfield',
      '#default_value' => $items[$delta]->ept_settings['heading_minutes'] ?? $this->t('Minutes'),
      '#description' => $this->t('Header for Minutes counter'),
      '#weight' => '7',
    ];

    $element['ept_settings']['heading_seconds'] = [
      '#title' => $this->t('Heading Seconds'),
      '#type' => 'textfield',
      '#default_value' => $items[$delta]->ept_settings['heading_seconds'] ?? $this->t('Seconds'),
      '#description' => $this->t('Header for Seconds counter'),
      '#weight' => '8',
    ];

    return $element;
  }

  public function massageFormValues(array $values, array $form, FormStateInterface $form_state) {
    foreach ($values as &$value) {
      $value += ['ept_settings' => []];
    }
    return $values;
  }
}
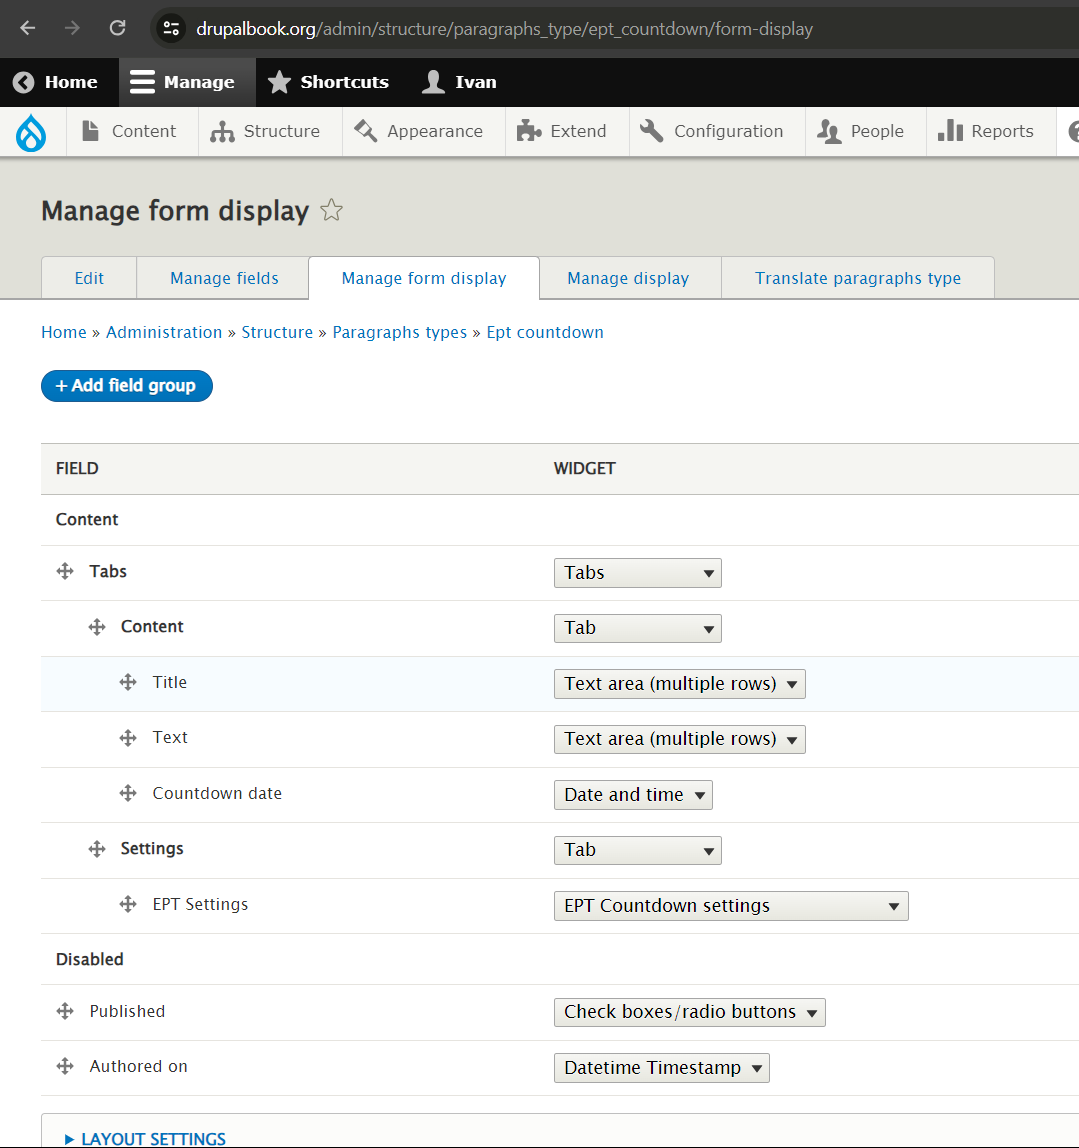
现在我们可以为 EPT Settings 字段选择我们自定义的小部件:
路径: /admin/structure/paragraphs_type/ept_countdown/form-display

保存段落后,通过 drupalSettings 检查 JavaScript 变量。现在来自 EPT Settings 的所有参数都会传递到脚本中:
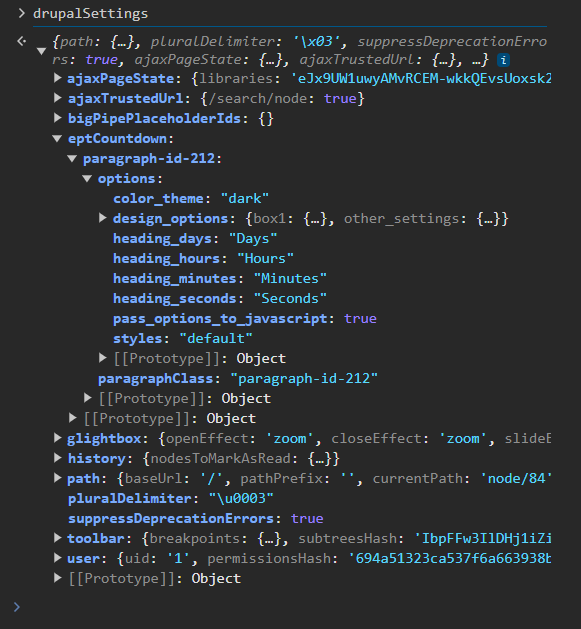
paragraph-id-* 键的末尾是段落的唯一 ID,用于标识对应的段落。
FlipDown 插件具有主题参数(light/dark)。我们通过 EptSettingsCountDownWidget 小部件中的 color_theme 字段传递该值:
$element['ept_settings']['color_theme'] = [
  '#title' => $this->t('Color theme'),
  '#type' => 'radios',
  '#options' => [
    'dark' => $this->t('Dark'),
    'light' => $this->t('Light'),
  ],
  '#default_value' => $items[$delta]->ept_settings['color_theme'] ?? 'dark',
  '#description' => $this->t('Select color theme for countdown'),
  '#weight' => '3',
];
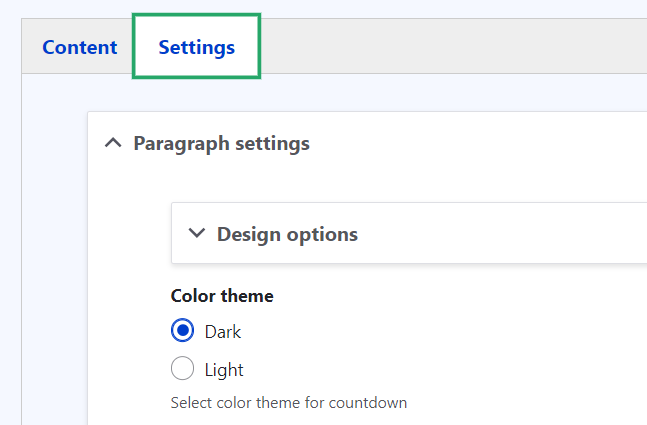
现在即可在 JavaScript 中通过 drupalSettings 读取主题值,并据此应用相应的样式:

步骤 4. 为 EPT Countdown 段落初始化 FlipDown 插件
步骤 4. 为 EPT Countdown 段落初始化 FlipDown 插件
我们已经通过 drupalSettings 将段落设置传递到 JavaScript。现在我们还需要将日期字段中的值传递过去。为此,在模板中创建一个空的 <div>,并添加一个 data-date 属性来存储时间戳值。使用 paragraph.id() 来分配唯一的段落 ID:
文件: paragraph--ept-countdown--default.html.twig
  <div
    class="ept-countdown-date ept-countdown-inline-block flipdown"
    id="paragraph-id-{{ paragraph.id() }}"
    data-date="{{ content.field_ept_countdown_date[0]['#attributes']['datetime']|date('U') }}">
  </div>

如果你不确定日期值存储在哪里,可以使用 Twig Debugger 模块,并在模板中插入 {{ dump(content.field_ept_countdown_date) }}。
date('U') 过滤器会将日期转换为 Unix 时间戳格式。
现在引入自定义 JavaScript 并初始化 FlipDown 插件:
文件: /ept_countdown/js/ept_countdown.js
(function ($, Drupal) {

  /**
   * EPT Countdown 行为。
   */
  Drupal.behaviors.eptCountDown = {
    attach: function (context, settings) {
      var countdowns = once('ept-countdown-paragraph', '.ept-countdown-date', context);
      countdowns.forEach(function(countdown) {
        var eptOptions = drupalSettings['eptCountdown'][countdown.getAttribute('id')];
        var countdownTimestamp = parseInt(countdown.getAttribute('data-date'));
        var countdownId = countdown.getAttribute('id');

        new FlipDown(countdownTimestamp, countdownId, {
          theme: eptOptions['options']['color_theme'],
        }).start();
      });
    }
  };

})(jQuery, Drupal);
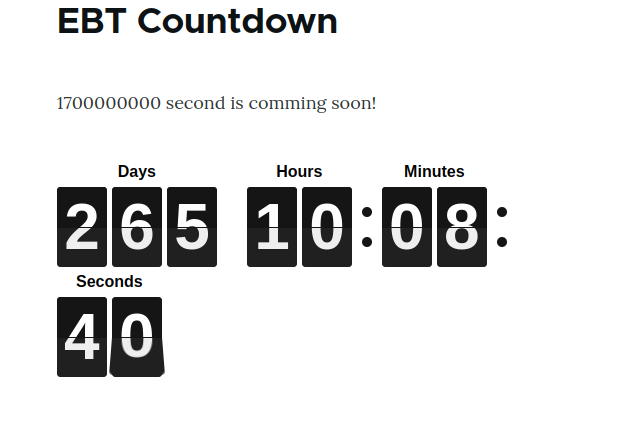
别忘了清理缓存以应用更改。之后,FlipDown 插件就会在页面上正确渲染:
步骤 5. 为新的 EPT Countdown 段落添加样式。对于通过 Drush 生成的模块,已自动包含 Gulp.js 文件。
步骤 5. 为新的 EPT Countdown 段落添加样式。对于通过 Drush 生成的模块,已自动包含 Gulp.js 文件。
正如我们所见,即使是默认的 FlipDown 样式在渲染时也不够完美 —— 例如,在桌面端数字会显示成两行。但我们可以很容易地通过自定义样式来修复这一问题。只需从 EPT Counter 模块或 EPT Core Kickstarter 模块中复制 gulpfile.js 和 package.json 文件即可。
gulpfile.js:
// 加载插件
var gulp = require('gulp'),
    sass = require('gulp-dart-scss'),
    postcss = require("gulp-postcss"),
    autoprefixer = require("autoprefixer"),
    cssnano = require("cssnano"),
    notify = require('gulp-notify'),
    sassUnicode = require('gulp-sass-unicode');

var config = {
  scssSrc: 'scss/*.scss',
  allScss: 'scss/**/*.scss',
  cssDest: 'css/',
  allJs: 'assets/js/**/*.js',
  allImgs: 'assets/img/**/*'
};

function style() {
  return gulp.src(config.allScss)
    .pipe(sass())
    .pipe(sassUnicode())
    .pipe(postcss([autoprefixer()]))
    .pipe(gulp.dest(config.cssDest));
}

exports.style = style;

function watch(){
  gulp.watch('scss/**/*.scss', style)
}

exports.watch = watch;
package.json:
{
  "name": "ept_styles",
  "version": "1.0.0",
  "description": "运行 npm install 然后执行 gulp watch",
  "main": "gulpfile.js",
  "scripts": {
    "test": "echo \"Error: no test specified\" && exit 1"
  },
  "devDependencies": {
    "autoprefixer": "^10.2.5",
    "cssnano": "^5.0.2",
    "gulp": "^4.0.2",
    "gulp-dart-scss": "^1.1.0",
    "gulp-notify": "^4.0.0",
    "gulp-postcss": "^9.0.0",
    "gulp-sass-unicode": "^1.0.5",
    "gulp-sourcemaps": "^3.0.0"
  },
  "dependencies": {
    "cucumber": "*",
    "postcss": "^8.2.13"
  }
}
package-lock.json 文件会在运行以下命令后自动生成:
npm install
然后你可以启动 Gulp 任务:
gulp watch
接下来,添加一个 SCSS 文件:
/ept_countdown/scss/flipdown.scss
.flipdown {
  width: 580px;
}
flipdown.css 文件会由 flipdown.scss 自动编译生成。将其包含到 ept_countdown.libraries.yml 中:
ept_countdown:
  css:
    component:
      /libraries/flipdown/dist/flipdown.min.css: { minified: true }
      css/flipdown.css: {}
清理缓存并检查结果:
显示效果现在已经显著改善!
我能否直接使用普通的 CSS,而不是 SCSS 编译?
是的,你可以。但大多数开发者更喜欢使用 SCSS,因为它更方便,也更易于扩展。
步骤 6. 使用额外的 FlipDown 插件参数扩展设置表单
步骤 6. 使用额外的 FlipDown 插件参数扩展设置表单
FlipDown 插件支持 theme 和 headings 参数,我们可以利用它们来自定义显示效果。我们已经创建了一个自定义字段小部件 EptSettingsCountDownWidget,现在我们将为其添加相应的字段。
文件: /ept_countdown/src/Plugin/Field/FieldWidget/EptSettingsCountDownWidget.php
public function formElement(FieldItemListInterface $items, $delta, array $element, array &$form, FormStateInterface $form_state) {
  $element = parent::formElement($items, $delta, $element, $form, $form_state);

  $element['ept_settings']['pass_options_to_javascript'] = [
    '#type' => 'hidden',
    '#value' => TRUE,
  ];

  $element['ept_settings']['color_theme'] = [
    '#title' => $this->t('Color theme'),
    '#type' => 'radios',
    '#options' => ['dark' => $this->t('Dark'), 'light' => $this->t('Light')],
    '#default_value' => $items[$delta]->ept_settings['color_theme'] ?? 'dark',
    '#description' => $this->t('Select color theme for countdown'),
    '#weight' => '3',
  ];

  $element['ept_settings']['styles'] = [
    '#title' => $this->t('Styles'),
    '#type' => 'radios',
    '#options' => ['default' => $this->t('Default'), 'new_year' => $this->t('New Year')],
    '#default_value' => $items[$delta]->ept_settings['styles'] ?? 'default',
    '#description' => $this->t('Select special style for countdown'),
    '#weight' => '4',
  ];

  $element['ept_settings']['heading_days'] = [
    '#title' => $this->t('Heading Days'),
    '#type' => 'textfield',
    '#default_value' => $items[$delta]->ept_settings['heading_days'] ?? $this->t('Days'),
    '#description' => $this->t('Header for Days counter'),
    '#weight' => '5',
  ];

  $element['ept_settings']['heading_hours'] = [
    '#title' => $this->t('Heading Hours'),
    '#type' => 'textfield',
    '#default_value' => $items[$delta]->ept_settings['heading_hours'] ?? $this->t('Hours'),
    '#description' => $this->t('Header for Hours counter'),
    '#weight' => '6',
  ];

  $element['ept_settings']['heading_minutes'] = [
    '#title' => $this->t('Heading Minutes'),
    '#type' => 'textfield',
    '#default_value' => $items[$delta]->ept_settings['heading_minutes'] ?? $this->t('Minutes'),
    '#description' => $this->t('Header for Minutes counter'),
    '#weight' => '7',
  ];

  $element['ept_settings']['heading_seconds'] = [
    '#title' => $this->t('Heading Seconds'),
    '#type' => 'textfield',
    '#default_value' => $items[$delta]->ept_settings['heading_seconds'] ?? $this->t('Seconds'),
    '#description' => $this->t('Header for Seconds counter'),
    '#weight' => '8',
  ];

  return $element;
}
现在我们可以在模板中使用标题和主题。元素 ID 遵循 paragraph-id-{{ paragraph.id() }} 模式,这样我们就能通过 drupalSettings 获取数据:
new FlipDown(countdownTimestamp, countdownId, {
  theme: eptOptions['options']['color_theme'],
  headings: [
    eptOptions['options']['heading_days'],
    eptOptions['options']['heading_hours'],
    eptOptions['options']['heading_minutes'],
    eptOptions['options']['heading_seconds'],
  ],
}).start();
此外,我们还使用设置中的 styles 值在模板中动态分配样式:
{%
  set classes = [
    'paragraph',
    'ept-paragraph',
    'ept-paragraph-countdown',
    'paragraph--type--' ~ paragraph.bundle|clean_class,
    'ept-paragraph--type--' ~ paragraph.bundle|clean_class,
    view_mode ? 'paragraph--view-mode--' ~ view_mode|clean_class,
    not paragraph.isPublished() ? 'paragraph--unpublished',
    'paragraph-id-' ~ paragraph.id(),
    content.field_ept_settings['#object'].field_ept_settings.ept_settings.styles,
    content.field_ept_settings['#object'].field_ept_settings.ept_settings.color_theme,
  ]
%}
如果选择了对应的样式,则有条件地附加 new_year 样式:
{% if content.field_ept_settings['#object'].field_ept_settings.ept_settings.styles == 'new_year' %}
  {{ attach_library('ept_countdown/new_year') }}
{% endif %}
ept_countdown.libraries.yml:
new_year:
  css:
    component:
      css/new-year.css: {}
/ept_countdown/scss/new-year.scss:
.ept-paragraph-countdown.new_year {
  background: url(../img/snowflakes.webp) center center repeat;
}
效果:

你可以为新的或现有的 EPT 模块添加任意数量的自定义样式。你也可以在 Drupal.org 上创建 issue 来提交你的样式建议:
步骤 7. 导出 EPT 段落和字段的配置
步骤 7. 导出 EPT 段落和字段的配置
我们已经完成了 EPT Countdown 的功能添加。现在是时候导出配置,并准备将模块发布到 Drupal.org 上了。
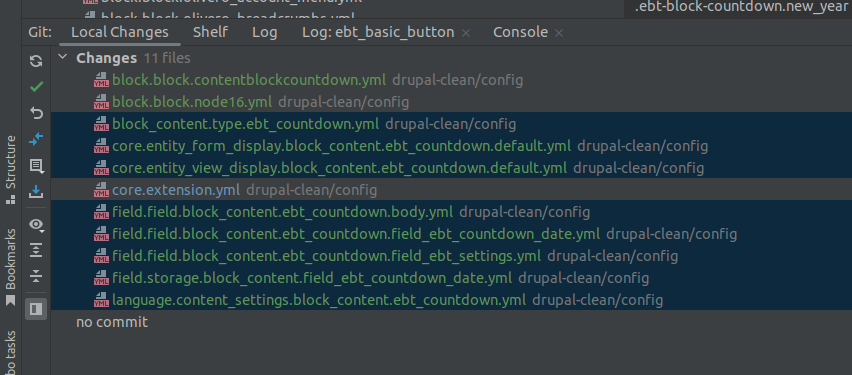
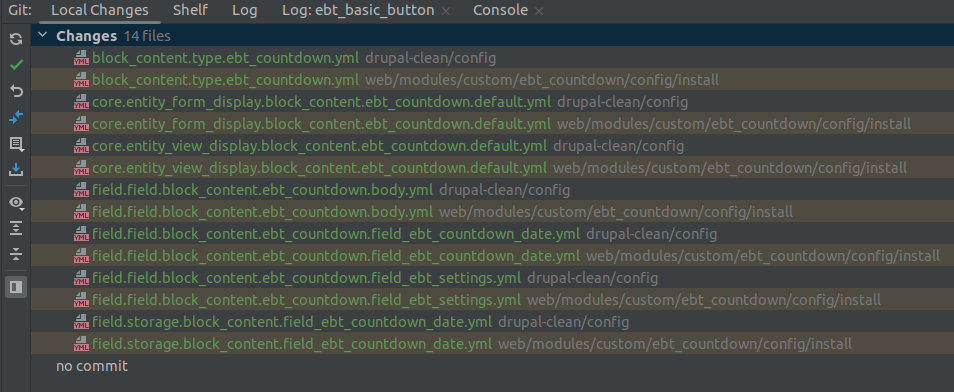
所有与 EPT Countdown 段落相关的配置必须复制到 /ept_countdown/config/install 文件夹中。
如果模块是使用 Drush 生成的,你应该重新导出配置,以确保所有字段和段落类型设置都已更新。
之后,你可以在 扩展 页面(/admin/modules)启用该模块。EPT Countdown 的所有段落和字段配置将会从 /config/install 自动安装:
无需包含 language.* 配置文件,因为某些站点可能未启用语言模块。
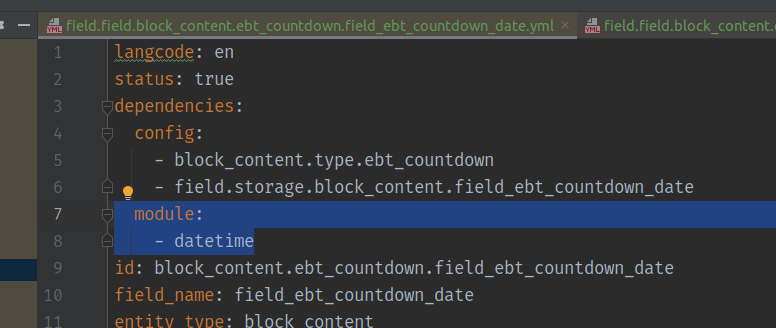
我通常会复制所有必需的 YAML 文件,并确保它们位于 config/install 目录下:
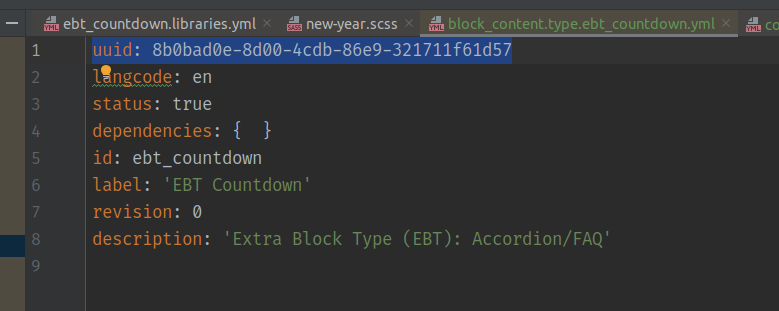
提交之前,请务必从 YAML 文件中删除 uuid 和 hashes:
如果你的模块依赖于其他 Drupal 模块(例如 datetime),请务必在 .info.yml 文件中列出它们作为依赖项:
/ept_countdown/ept_countdown.info.yml:
dependencies:
  - drupal:datetime
现在,你的模块已准备好上传并发布到 Drupal.org。
步骤 8. 在 Drupal.org 上部署与测试
步骤 8. 在 Drupal.org 上部署与测试
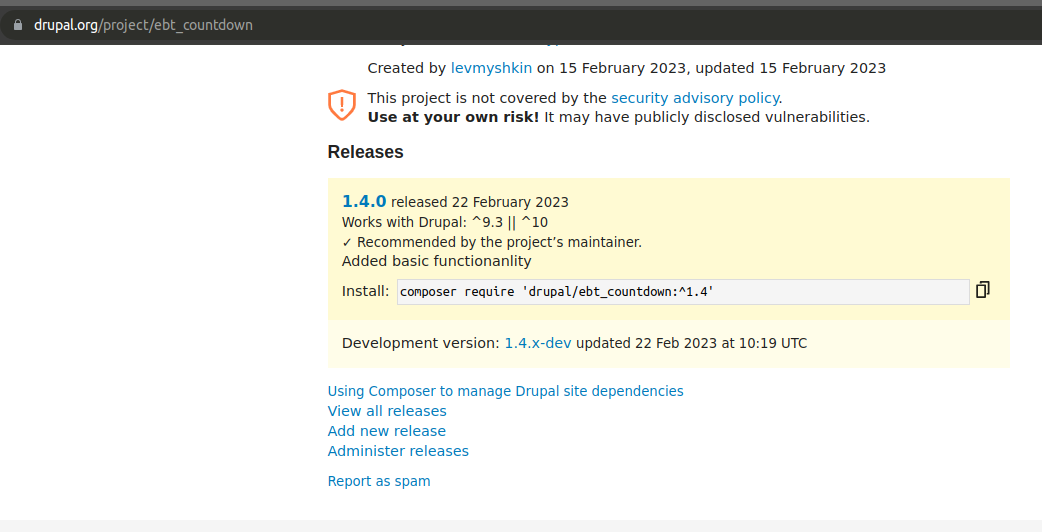
我们已经在 Drupal.org 上创建了一个新项目:
https://www.drupal.org/project/ept_countdown
主分支选择为 1.4.x,以保持与 EPT 生态系统中其他模块的一致性:
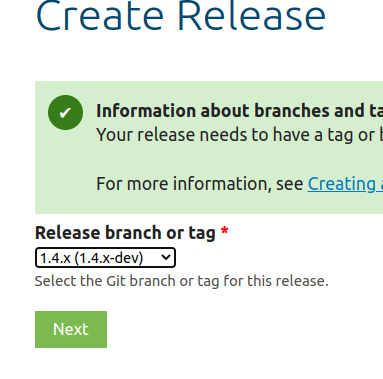
所有发布版本现在将从 1.4.0 开始:
git tag 1.4.0
git push origin 1.4.0
在发布稳定的 1.4.0 版本之前,你也可以创建如 -alpha 或 -beta 的预发布版本。
在创建项目之后,你需要等待 10 天,模块才能被纳入 安全公告覆盖(Security Advisory Coverage) 计划:
现在你可以在不同的内容类型中测试新模块,验证 FlipDown 的行为、主题设置和标题。如果有需要,可以提交错误报告并发布补丁。
步骤 9. 添加 README.md 文件
步骤 9. 添加 README.md 文件
如果你是使用 Drush 生成的 EPT 模块,README.md 文件应该已经自动创建。
无论如何,请不要忘记在你的模块中包含 README.md 文件。这个文件非常重要,它包含模块描述、需求、安装步骤和使用指南。你可以在另一个 EPT 模块中查看示例:
https://www.drupal.org/project/ept_slideshow
感谢你使用 EPT 模块!你随时可以提出问题或分享想法: