Working with configurations using Drupal UI
Here’s a simple example demonstrating how a site name can be configured in one environment and deployed in another. This example involves manually uploading and downloading .tar.gz configuration files, but it’s also possible to keep your site’s sync directory under version control and synchronize that way.
1. Install Drupal 8. We’ll refer to this as the “Production” site.
2. Create a copy of this site at a different URL – this will be the “Development” site. Make a copy using the same source code, files directory, and a database dump from the Production site. Remember, the configuration system is meant for syncing settings between copies of the same site – this means UUIDs must match. You should always start by copying the full site and database. (However, you don’t need to do this before you begin adding content to your site.)
In Drupal 7, you only needed the database and uploaded files, but in Drupal 8, other parts of the file directory are relevant, including configuration and PHP files.
Once this process is improved, copying a site will be as simple as installing from exported config. For now, a full site copy is required.
3. After copying, edit the settings.php file in the new copy (Development) and update the MySQL details in the $databases array.
4. Check file/directory ownership and permissions (Drupal may complain if the sync directory isn’t writable).
5. Clear/rebuild the cache.
6. Let’s simulate a configuration change. On the Development site, go to admin/config/system/site-information and change the site name.
7. Export the full configuration of the Development site at admin/config/development/configuration/full/export. This will generate a compressed file named something like config-site-domain-name-2017-01-10-15-38.tar.gz.
8. On the Production site, navigate to admin/config/development/configuration/full/import and upload the tar.gz file.
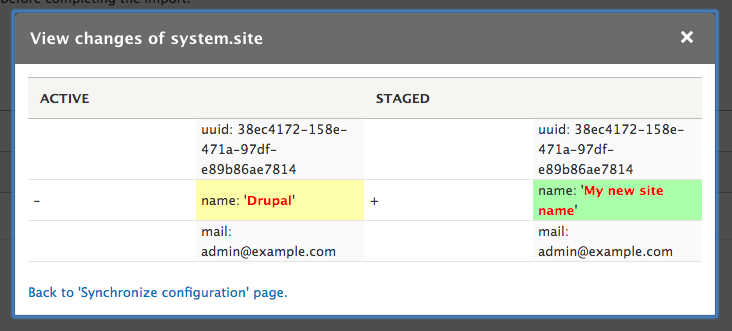
9. After uploading, you'll be redirected to the Sync tab. Here you’ll see a list of YAML files to be added, changed, or removed. Clicking “View differences” shows a detailed diff comparing “Current” and “Staged” configurations.
10. Click Import all to apply the configuration changes. You should see a success message, followed by a note: “There are no configuration changes to import.”
Your site name will now also be updated in Production. While the ideal workflow is to make all changes in Development and deploy them to Production, there may be times when configuration is updated directly on the Live site (either by necessity or by users). In addition to roles and permissions, you can prevent any user from making config changes by using the Configuration Read-Only module.
If you visit /admin/config/development/configuration, Drupal will warn you about unimported changes:
The following items in your active configuration have changes since the last import, which may be lost on the next configuration import.
To export those changes from Production to Development:
- Export the full configuration from Production via
admin/config/development/configuration/full/export. This generates a new.tar.gzfile. - On the Development site, go to
admin/config/development/configuration/full/importand upload the file. Review changes and click Import all.
You can continue making changes in Development and export to Production once you're satisfied.
If you’re running a high-traffic interactive site, consider enabling maintenance mode on the Production environment while importing a full config set. This avoids conflicts between user activity and configuration changes, and gives you a chance to preview updates as an admin before taking the site live again.