HTML First Steps – An HTML Tutorial
HTML is a fairly simple language. It's taught to both technical and liberal arts students in universities, and I believe it’s now even being taught in most schools. It’s all quite simple because HTML isn’t even a programming language.
HTML is a markup language—what you write is exactly what gets displayed on the screen. No algorithms, flowcharts, loops, variables, or classes—just text, text, and more text. HTML consists only of tags, and even those aren’t many. The frequently used ones probably don’t even total thirty. So, if you've decided to learn a language related to programming, HTML is a great place to start.
To start creating documents in HTML format, you'll need a text editor like Notepad (included in Windows and Linux), and a browser to view the documents (Firefox, Opera, Chrome, or Internet Explorer). Personally, I use Notepad++ on Windows as my text editor.
I think those few lines are enough to get us ready for learning, so let’s begin.
My First HTML Document
HTML documents are plain text files, just like readme.txt and other .txt files.
Note:
What is a file extension?
File extensions are mainly used in operating systems with graphical interfaces. Their purpose is to let the OS know which program to use to open a file. We won’t go into all the extensions for executable files like .COM, .EXE, .BAT, .CMD, or .VBS, but for HTML documents, we’ll be using the extensions
.HTMLor.HTM.
It’s time to create a document. Go to the desired folder, right-click in an empty space:
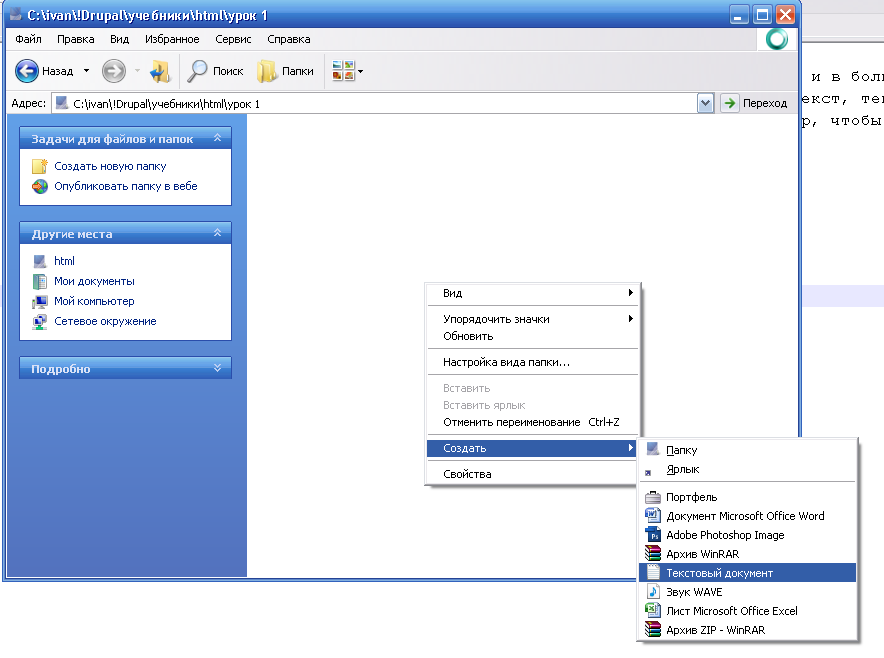
Select “Create New Text Document.” Name the file index.html. You can also use .htm as the extension.
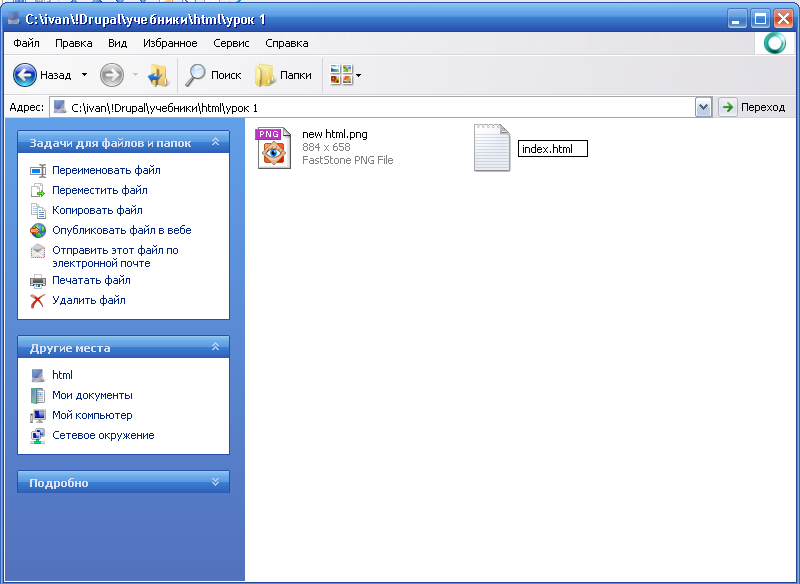
If your system settings don’t let you change the extension, the file might save as index.txt. In that case:
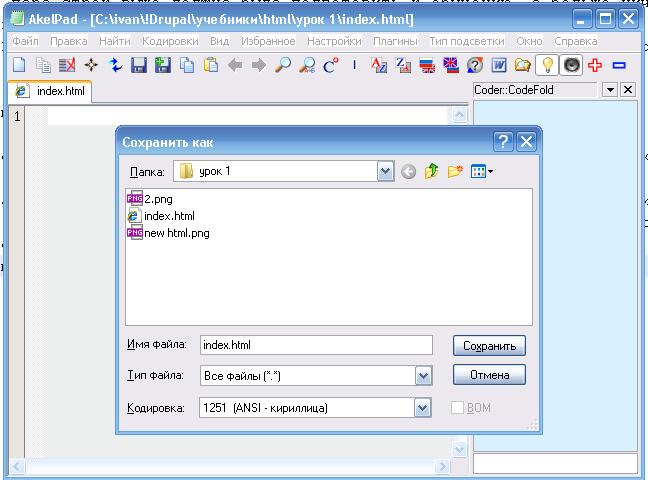
- Open
index.txtwith Notepad. - Go to File → Save As.
- In the dialog box, manually enter the desired extension.
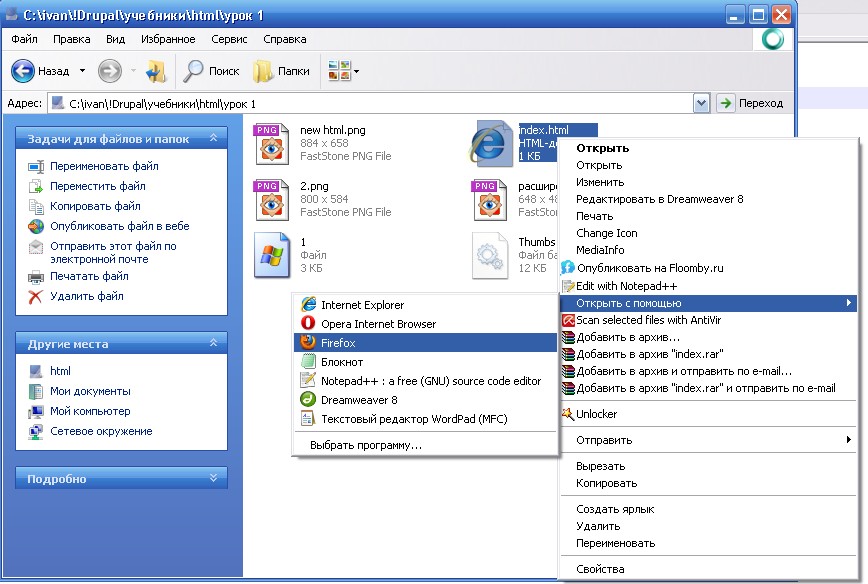
Now that the file index.html is created, open it in Notepad and begin writing HTML markup.
HTML markup is created using tags, which look like this:
<tag>Some text</tag>The first tag is the opening tag, enclosed in angle brackets. The angle brackets are not pronounced; we simply say “this is the tag ‘tag’.”
Let’s start with the simplest tag: <html></html>. This is the main tag; it starts and ends an HTML document:
<html>
</html>
You can write tags in one line, but it’s more convenient to place each tag on its own line vertically—Notepad++ will highlight them for better readability.
Next, inside the <html> tag, place the <body></body> tag. The body is literally the body of your document. Everything visible in the browser goes inside this tag. Speaking of the browser—let’s modify index.html and save the file:
<html>
  <body>
  </body>
</html>
Notice how I indented the body tag by two spaces. This improves document readability. Now save and open the file in your browser:
You’ll see a blank screen—and that’s correct, because we haven’t added any content yet.
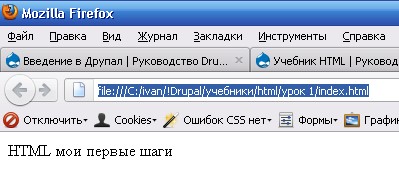
Let’s add some text inside the body tag:
<html>
  <body>
    HTML – My First Steps
  </body>
</html>
Save the file and refresh the page in your browser. The text "HTML – My First Steps" should now appear. It’s showing because we placed it inside the body tag—not above or below it, but inside.
You may have noticed the title bar still just says “Mozilla Firefox” or similar—our document doesn’t have a proper title. Let’s fix that by adding a title inside the <head></head> tag, which goes above the body tag:
<html>
  <head>
  </head>
  <body>
    HTML – My First Steps
  </body>
</html>
Saving and refreshing the page won’t change anything yet. You need to include the <title></title> tag inside head to set the browser’s tab title:
<html>
  <head>
    <title>HTML – First Steps at drupalbook.org</title>
  </head>
  <body>
    HTML – My First Steps
  </body>
</html>
Save and refresh—voilà! Your document now has a title.
This is enough for an introductory lesson. In the next lessons, we’ll dive deeper into HTML and explore many more features.