Content Management
Adding Content
This guide assumes you used the standard installation profile, which provides two content types: Basic Page and Article. (If you used the minimal profile, you’ll need to create content types first.)
Before we begin: make sure you are logged in as a user with permission to create content — ask your site administrator if you’re unsure. Otherwise, some fields may not be visible to you.
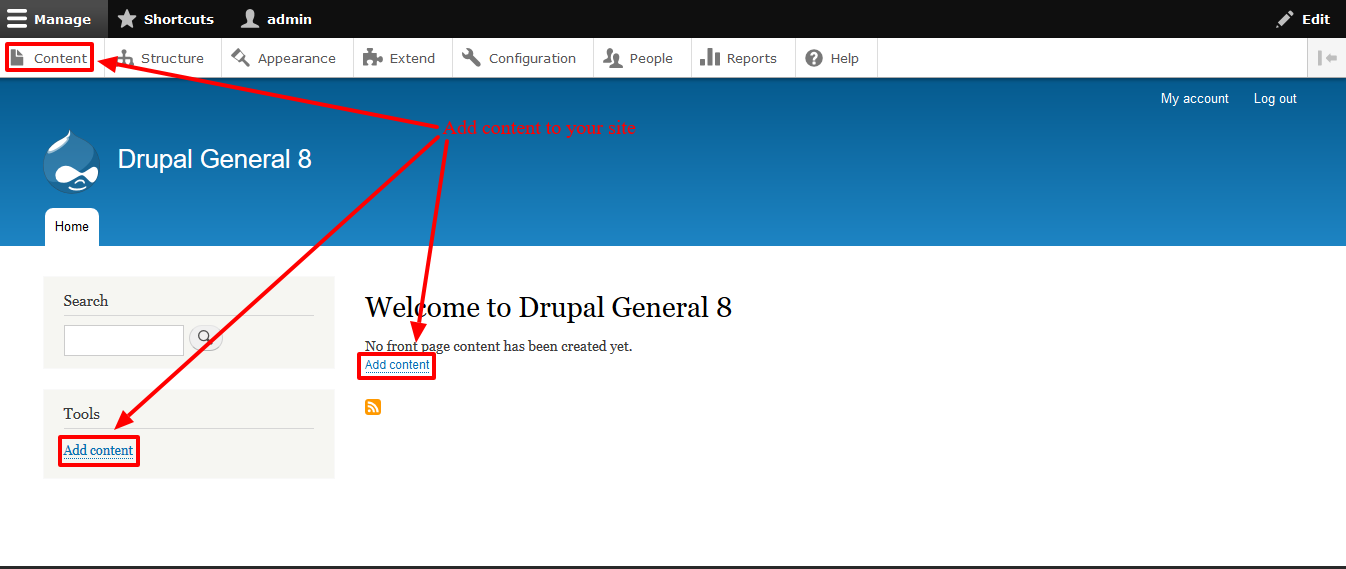
1. Click “Add content” from the homepage (either in the navigation menu or the admin menu).
2. A screen will appear asking you to choose which content type to add. By default, Drupal 8 includes two content types: Article and Basic Page.
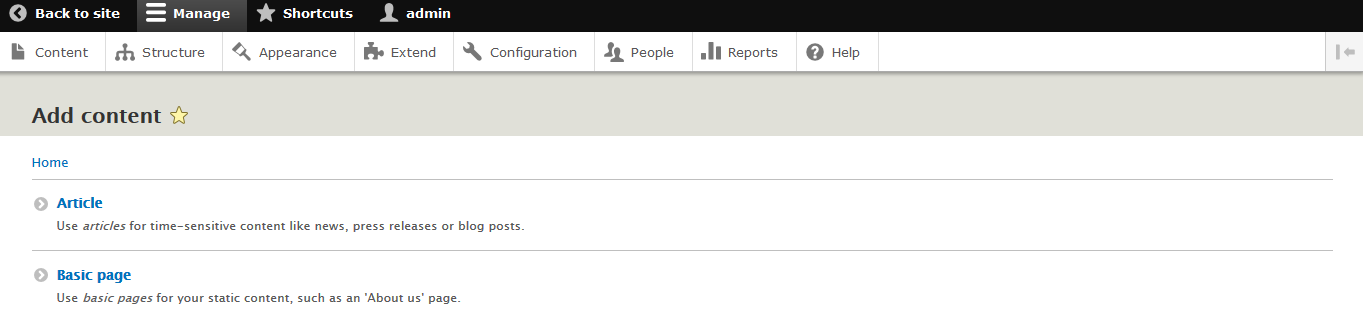
3. Choose Article. The main difference between an Article and a Basic Page is that the Article content type includes an image upload option. Basic Pages are intended for static content. You can update the fields for a content type later.
4. A form will appear allowing you to enter information for your article. You can also configure options for the revision log, menu, comments, copyright, and SEO. These options may expand as you grow your Drupal instance and install additional modules.
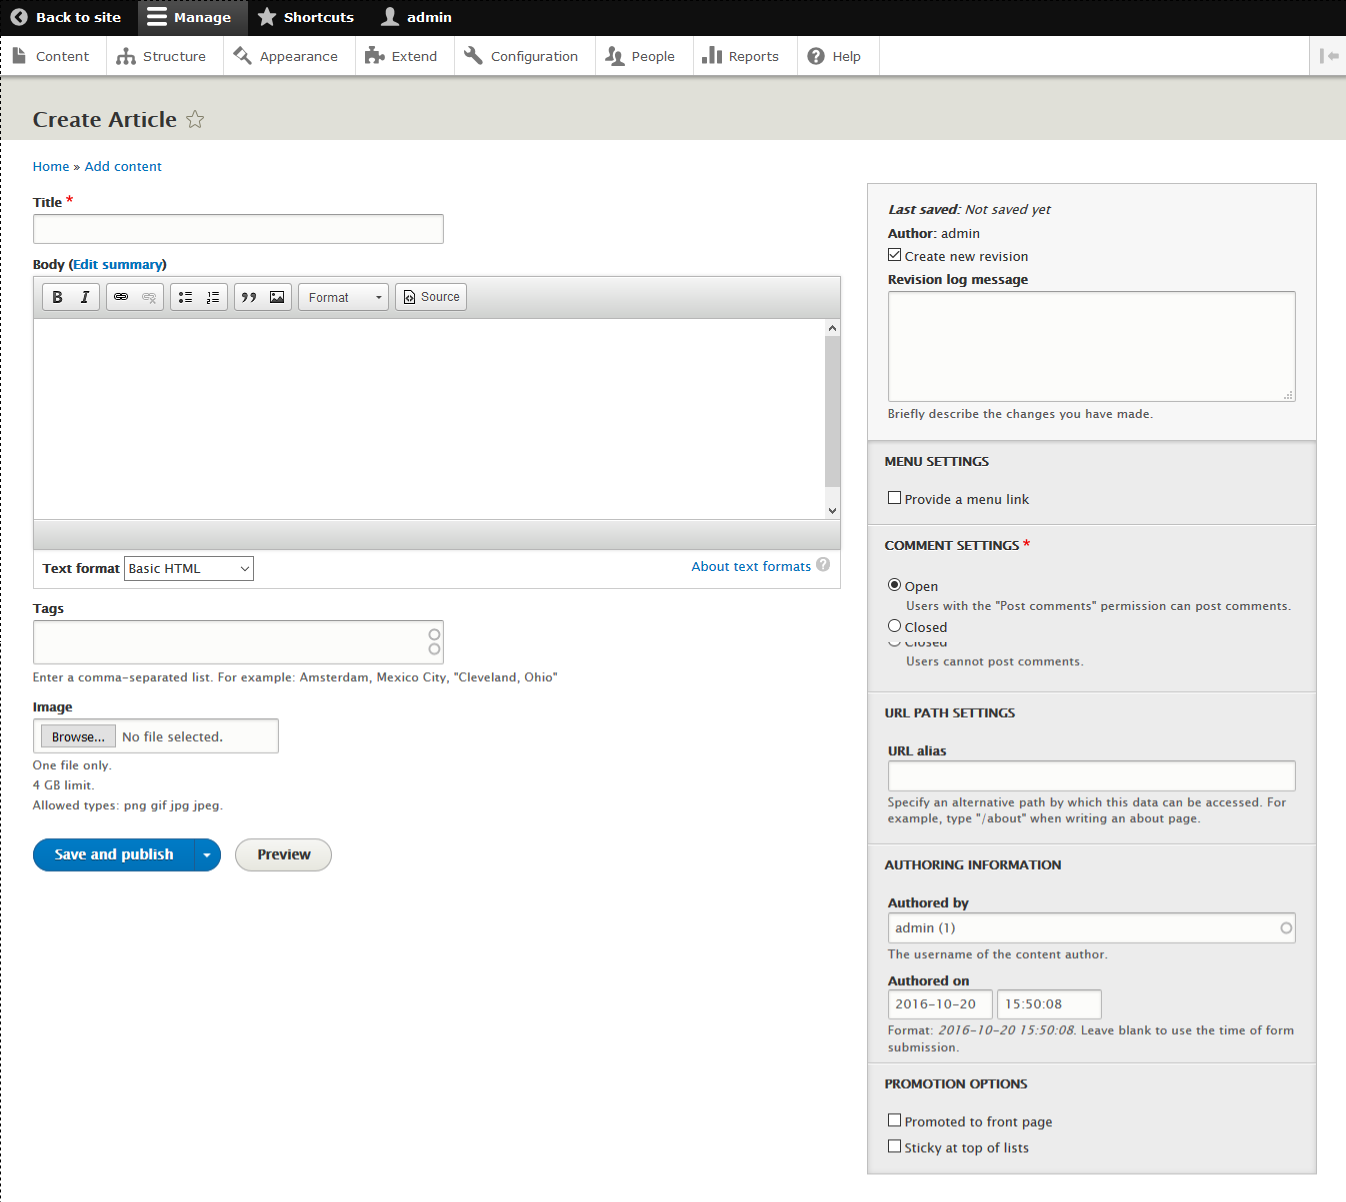
5. Enter the page title in the “Title” field, such as “Test Article.”
6. In the Summary area, enter a brief description of your article.
7. In the Body area, enter your text. If you already have content prepared, you can copy and paste it here. Choose a formatting option from the “Text format” dropdown below the text area. Default options include Basic HTML, Restricted HTML, and Full HTML.
8. You may tag your content. To learn more about tags, click here.
9. You can upload an image with your content type.
10. Click Save. The “Save” button allows you to either publish your content or save it as unpublished.
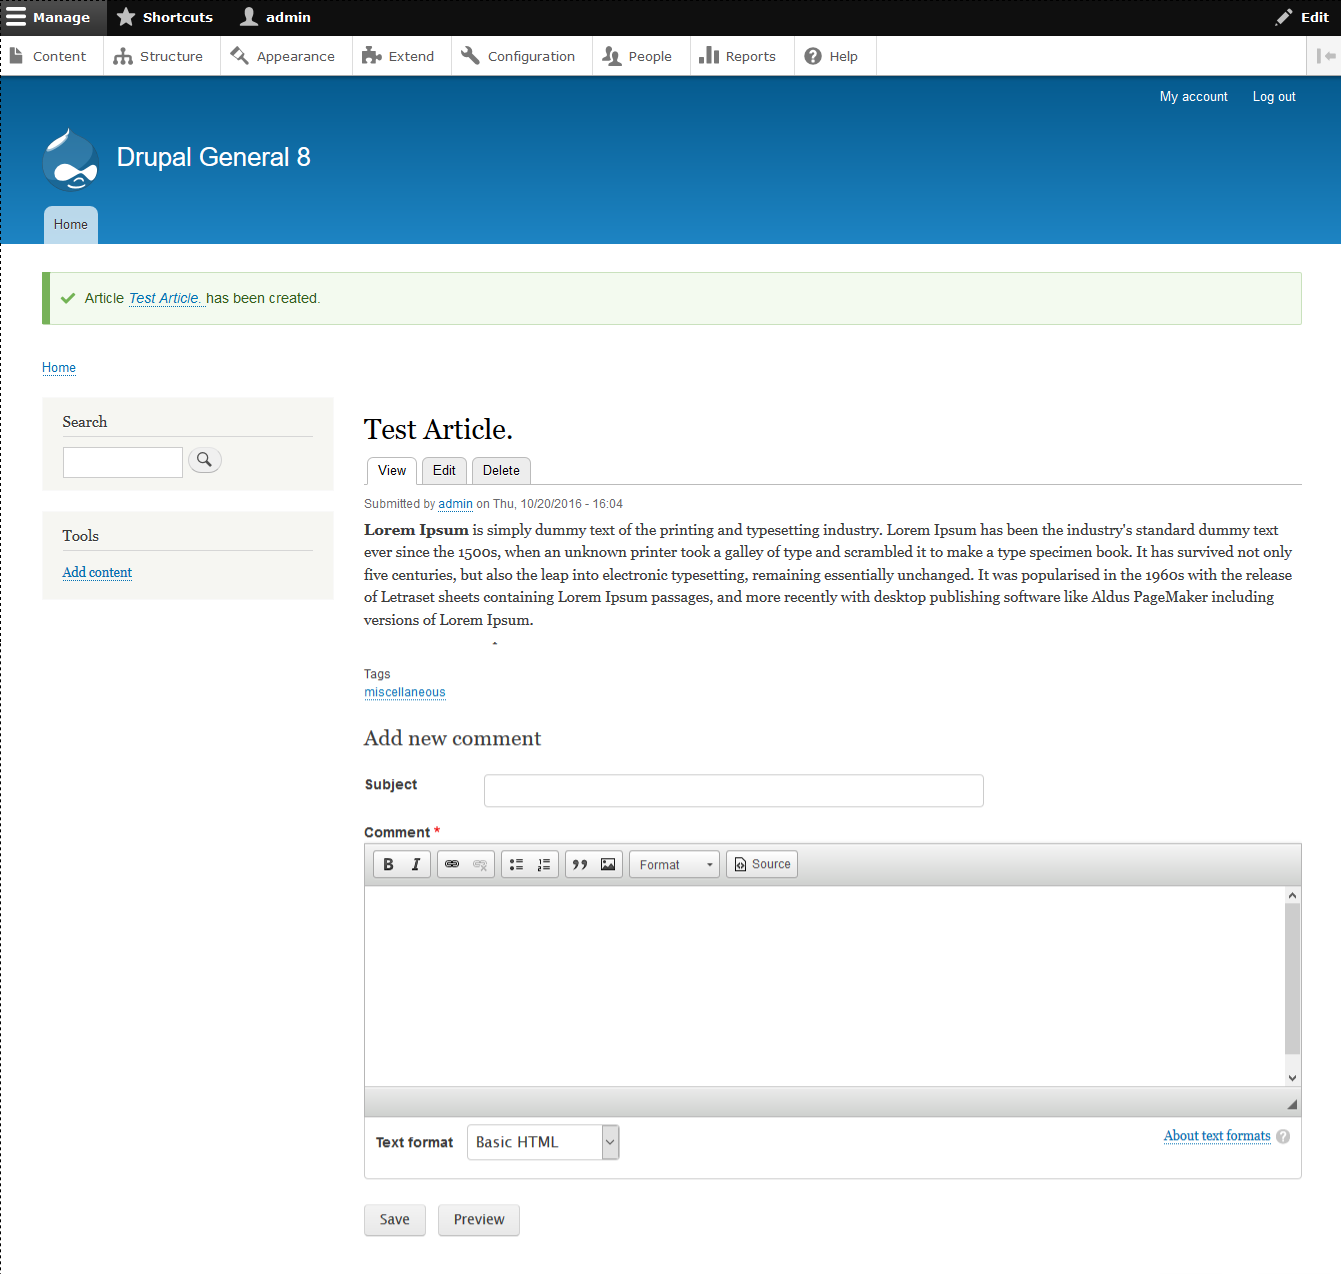
11. You should now see your published post.
Managing Nodes
You can perform various actions on one or more nodes. You can mark them as published or unpublished, promote them to the front page or demote them, make them sticky (stay at the top of listings), or delete them.
Click “Content” in the admin menu or visit /admin/content to see a list of all content in your Drupal site.
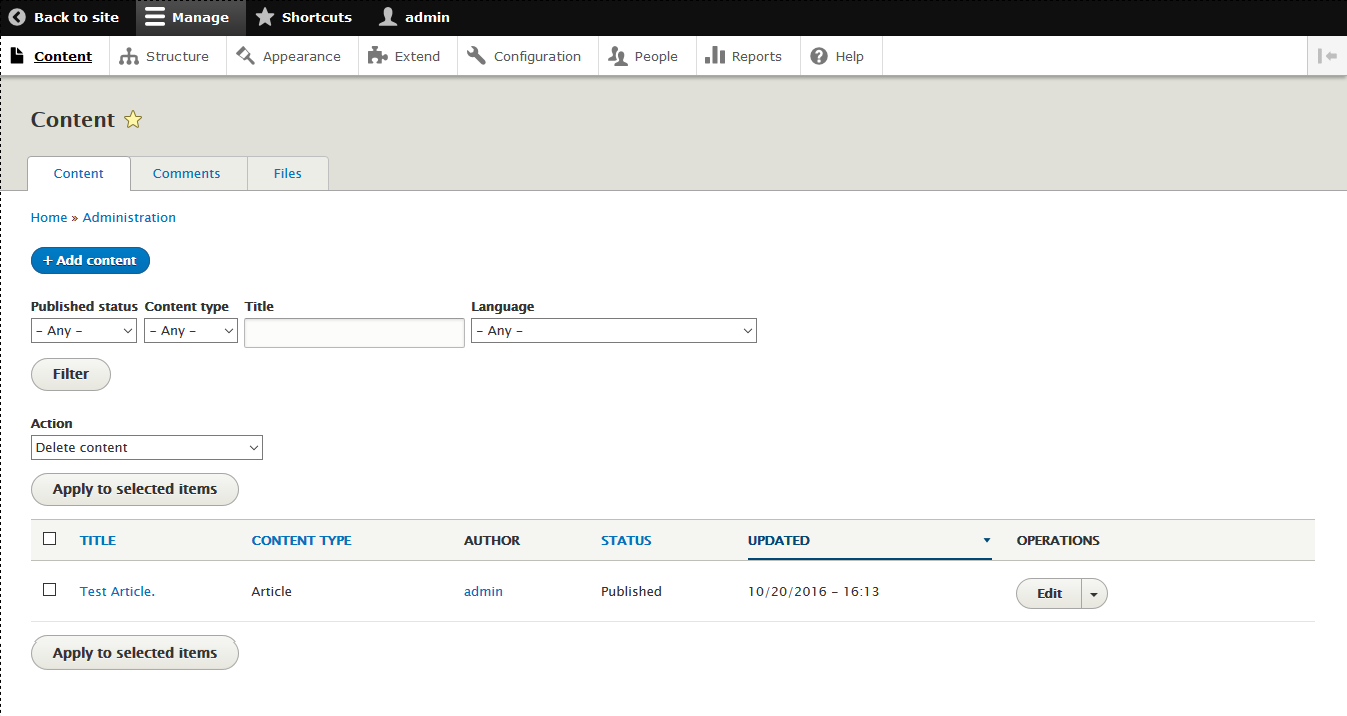
- Click Administration > Content.
- Optionally filter the displayed content by status, type, title, or language:
– Select your desired filter values.
– Click the “Filter” button to apply your filters.
- Select individual items using the checkbox to the left of each row.
- To select all items, click the checkbox next to the column header.
- Choose an administrative action from the operations dropdown, such as “Remove content from front page.”
- Click “Apply to selected items.”
For more on configuring node permissions, see Managing Users.
Managing Comments
You can view a list of all comments and choose to unpublish or delete selected comments.
- Click Administration > Content
- Click the Comments tab.
- Select one or more comments.
- From the dropdown, choose “Unpublish” or “Delete.”
- Click “Update.”