PHP Lessons - Lesson 3.2 - Working with MySQL DB. Inserting data INSERT INTO. Selecting data SELECT
In the previous lesson, we created a table for our website. In this lesson, we will improve the table and start working with the database: adding and retrieving data from it. I don’t think anything too difficult is coming up, so let’s begin.
First, I suggest we improve our messages table. Right now it has fields for the data, but it needs an extra column for numbering records. If you look at the Drupal database, the node table has a nid field for this purpose. We’ll do something similar with our messages table.
Let’s go into phpMyAdmin (http://localhost/tools/phpmyadmin for Denwer) and modify our table. Add a new column at the beginning of the table, as shown in the image:
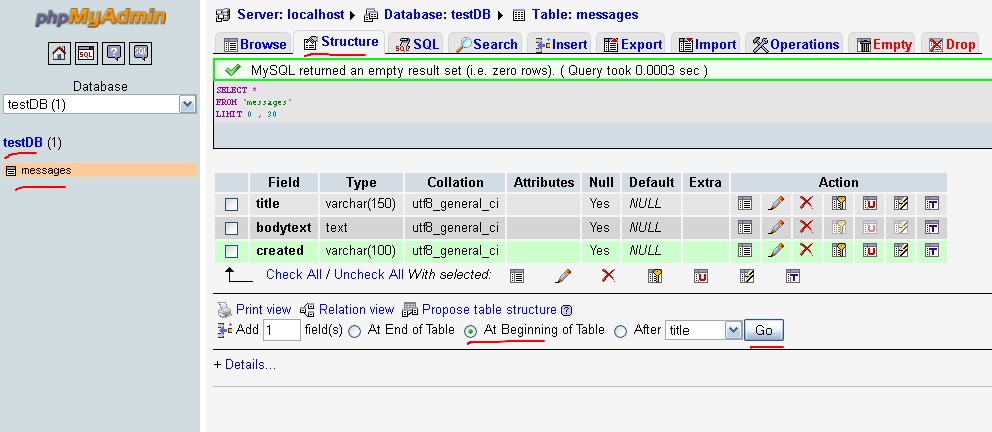
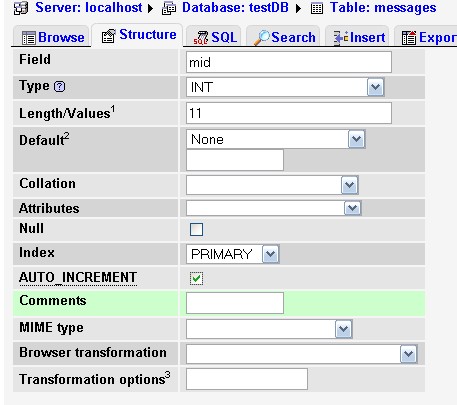
Name the column mid (message id), set its data type to INT with a length of 11. Also check the AUTO_INCREMENT box so values increment automatically, and set it as the primary key.
Remember we created a separate buildDB() method in the simpleCMS class to create the table? Now we should update it to include the mid field. Go to the messages table in phpMyAdmin and click "Export":
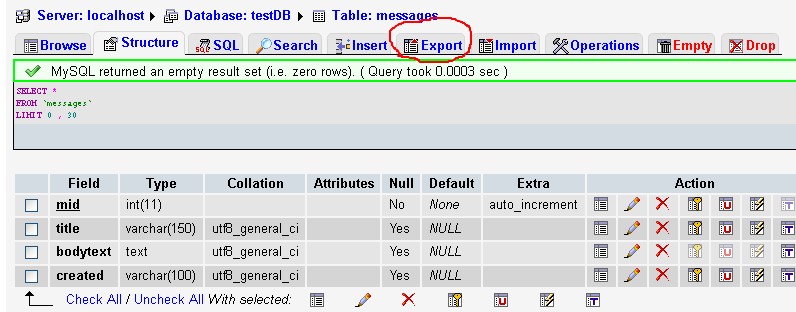
This opens the export page. Export is done via SQL statements that create and modify tables. If we change the table through phpMyAdmin, we can later copy the SQL command—it’s very convenient.
Leave all settings as default and click OK. phpMyAdmin will generate the SQL code either in the browser or as a file. Copy the generated code:
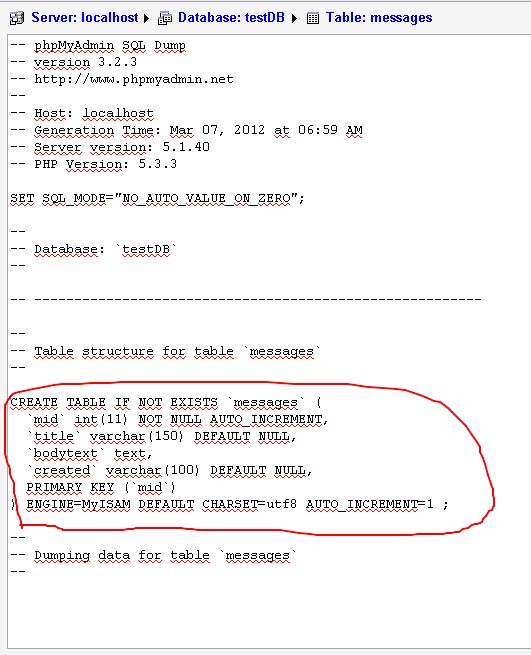
Note the backticks used by phpMyAdmin. In PHP, we can use single quotes instead. Copy the code into our buildDB() method:
public function buildDB(){
  $sql = "CREATE TABLE IF NOT EXISTS 'messages' (
            'mid' int(11) NOT NULL AUTO_INCREMENT,
            'title' varchar(150) DEFAULT NULL,
            'bodytext' text,
            'created' varchar(100) DEFAULT NULL,
            PRIMARY KEY ('mid')
          ) ENGINE=MyISAM DEFAULT CHARSET=utf8 AUTO_INCREMENT=1";
  return mysql_query($sql);
}
Now let’s test it. Delete the messages table:
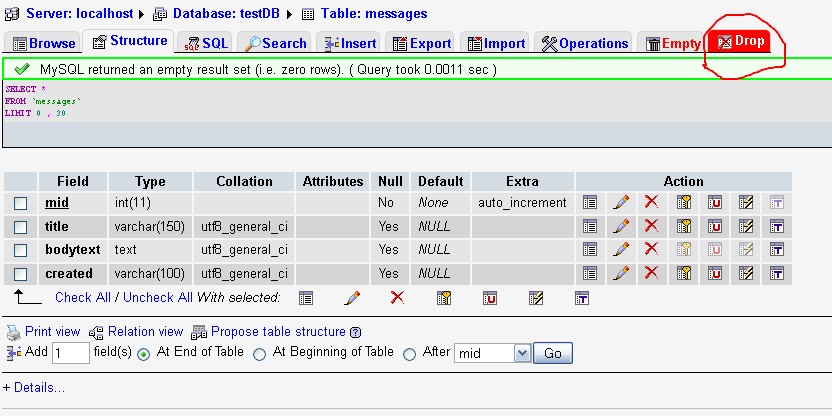
Confirm the deletion. Now when we run index.php on our site, the buildDB() method will be triggered and recreate the messages table:
public function buildDB(){
  $sql = "CREATE TABLE Messages
  (
    mid int NOT NULL AUTO_INCREMENT,
    PRIMARY KEY(mid),
    title varchar(15),
    bodytext text,
    created int(11)
  ) ENGINE=MyISAM DEFAULT CHARSET=utf8 AUTO_INCREMENT=1";

  $result = mysql_query($sql);
  print_r($result);
}
Run index.php and the Messages table will be created as before.
INSERT INTO queries
Now that the database is set up, we’re ready to implement our methods for writing to and reading from the DB. Let’s start with writing. Open the write() method to modify it.
We use INSERT INTO like this:
public function write($p) {
  $sql = 'INSERT INTO Messages (title, bodytext, created) VALUES ("'. $p["title"] . '", "' . $p["bodytext"] . '", ' . time() . ')';
  return mysql_query($sql);
}
Let’s break it down. The INSERT INTO statement starts the query, followed by the table name Messages. Then we specify which columns to insert values into. Note we don’t specify mid—MySQL will handle it automatically because of AUTO_INCREMENT.
Then comes VALUES, followed by the actual values. The order and number of values must match the specified columns.
If a value is a string, enclose it in quotes. Make sure your quotes don't conflict with PHP syntax, e.g.:
"'. $p["title"] . '"That's double quote, single quote, dot, variable, dot, single quote, double quote. Don’t worry if this seems complex now—more examples will follow. For now, just insert a couple of records using the updated method.
SELECT queries
After adding some records, check phpMyAdmin:
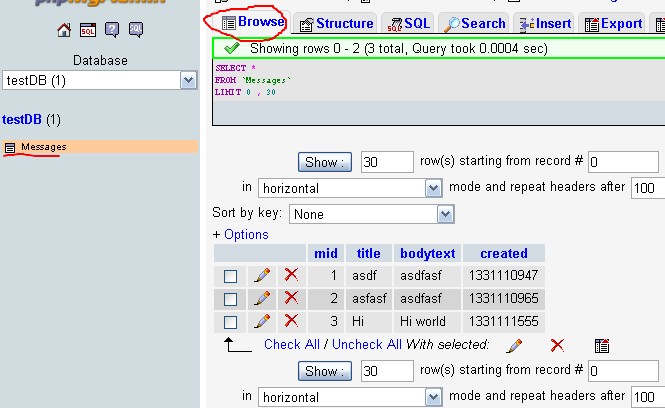
Now we can display those messages using the display_public() method, which we’ll also modify. To retrieve data, we use the SELECT statement:
public function display_public() {
$content = '';
$sql = 'SELECT * FROM Messages';
$result = mysql_query($sql);
while($row = mysql_fetch_array($result)) {
print '';
print '#' . $row['mid'] . ' on ' . date('d-m-Y', $row['created']) . '' . $row['title'] . '
';
print '' . $row['bodytext'] . '
';
print '';
}
$content .= '';
return $content;
}We’ve replaced the entire display_public() method. Now all records are fetched from the DB. Let’s explain:
SELECT * means select all columns from each row. If we wanted only specific columns:
$sql = 'SELECT mid,title FROM Messages';FROM specifies the table. The result of mysql_query() must be stored in a variable for use with mysql_fetch_array(), which fetches one row at a time. Once there are no more rows, it returns false, so we use a while loop to process all rows.
Sorting with ORDER BY
You can sort the results with ORDER BY. By default, it’s ascending:
$sql = 'SELECT * FROM Messages ORDER BY mid';For descending order, use DESC:
$sql = 'SELECT * FROM Messages ORDER BY mid DESC';Ascending can be explicitly set with ASC, though it’s optional:
$sql = 'SELECT * FROM Messages ORDER BY mid ASC';Filtering with WHERE
You can filter results using WHERE:
$sql = 'SELECT * FROM Messages WHERE mid 3 ORDER BY mid DESC';This retrieves records where mid is less than 3. Use AND or OR for compound conditions:
$limit_time = time() - 3600; // 1 hour ago
$sql = 'SELECT * FROM Messages WHERE mid  3 AND created > ' . $limit_time . ' ORDER BY mid DESC';
This gets messages with mid less than 3 and created within the last hour.
That’s enough about SELECT for now—on to the next lesson!