Setup Access Token / OAuth Based Authentication
OAuth (Open Authorization) is an open standard for token-based authentication and authorization protocol that can be used to provide single sign-on (SSO). OAuth allows particular information about an end user's account to be used by third-party services, such as Facebook, etc without exposing the user's password. It acts as an intermediary on behalf of the end user, providing the service with an access token that authorizes specific account information to be shared.
This Drupal API authentication method uses the OAuth 2.0 protocol to obtain a security access token. This token is used to authenticate access to your Drupal site APIs. The OAuth method provides a highly encrypted and secure access token, ensuring your Drupal APIs are well-protected. It is considered one of the most secure ways to prevent unauthorized access to your Drupal REST or JSONAPI endpoints. This module is compatible with Drupal 7, Drupal 8, Drupal 9, Drupal 10, and Drupal 11.
Setup Video:
In OAuth 2.0, the following three parties are involved:
- The user possesses data that is accessed through the API and wants to allow the application to access it.
- The application wants to access the data through the API on the user's behalf.
- The API endpoint, controls and enables access to the user's data.
The API will grant access only when it receives a valid access token from the application. How the application obtains an access token is dependent upon the OAuth scheme that is in use.
Pre-requisites: Download and Installation:
- Download & install the Drupal REST & JSON API Authentication module.
- REST UI: This module provides you with a user interface for configuring the REST module.
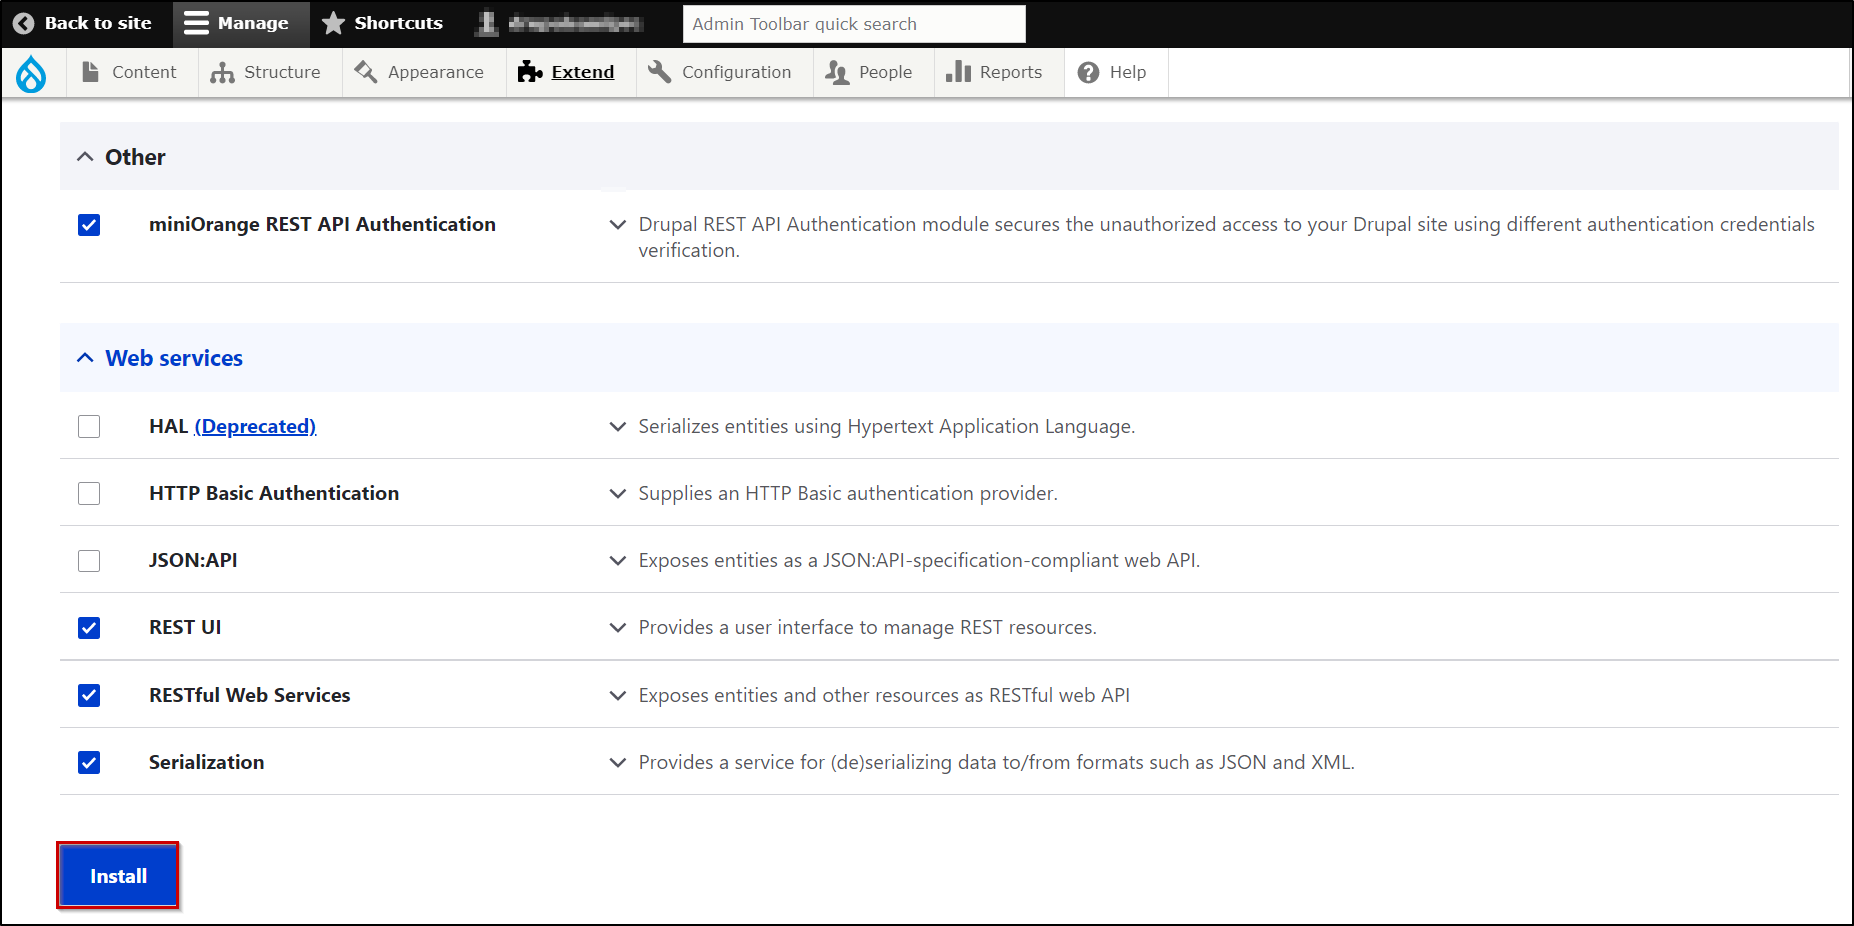
- Enable the following Web Services modules from under the Extend section(/admin/modules) of your Drupal site:
- JSON: API
- REST UI
- RESTful Web Services
- Serialization
Steps to configure OAuth/Access Token-Based API Authentication:
- For better understanding, we will be taking an example of adding OAuth/Access Token-based authentication to the get user information API for Drupal.
- Please note that Drupal's get user information API is used to retrieve user information.
Enable the API and assign methods and operations as follows:
- The first step is to enable the API and also assign methods and operations allowed on that particular API. This can be done using the REST UI module or you can simply modify the config.
- To enable the API using the REST UI module, click on the Configure button of the REST UI module(as shown below)

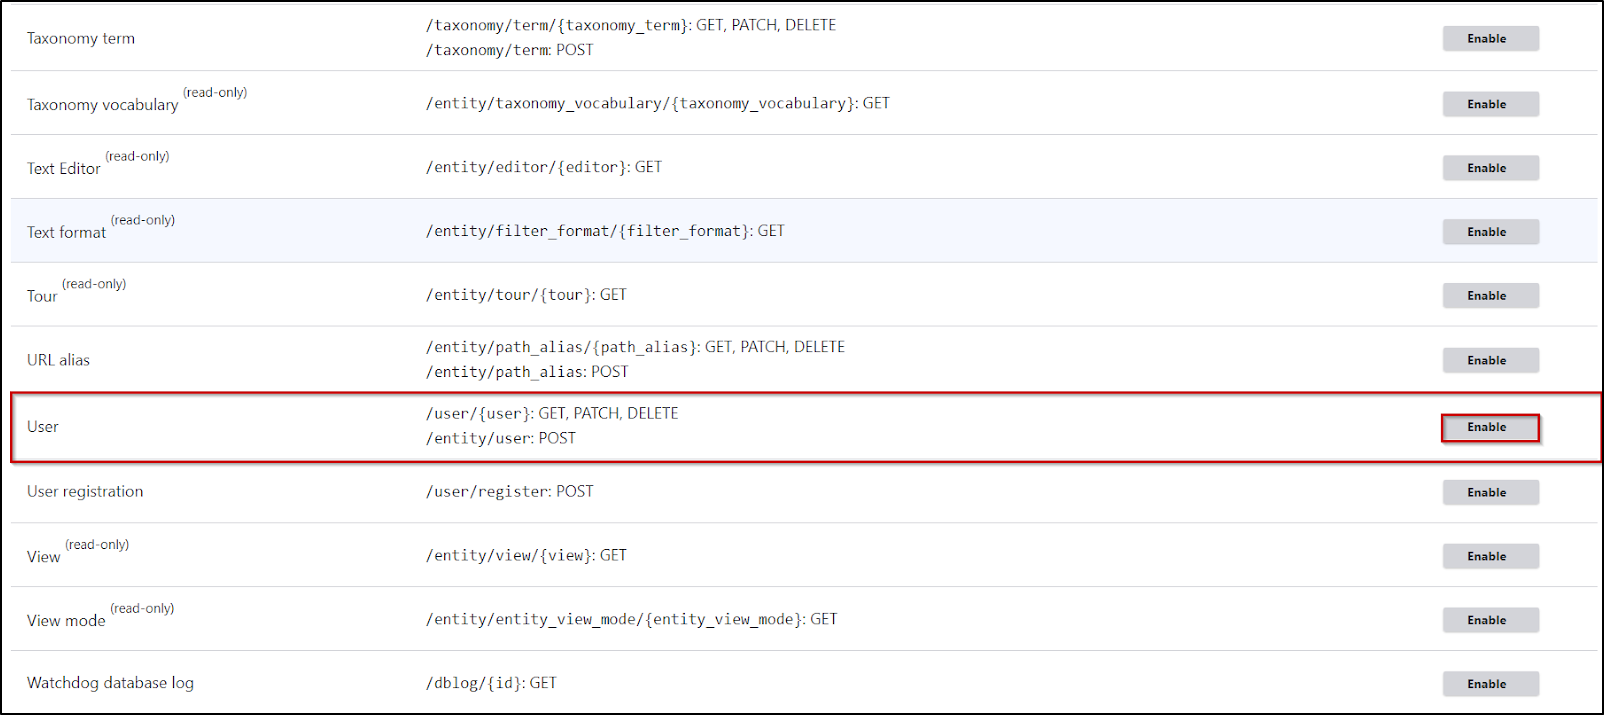
- Considering our example, we want to enable the /user/{user} API present under the Content section. Enable this API using the Enable option in front of it.
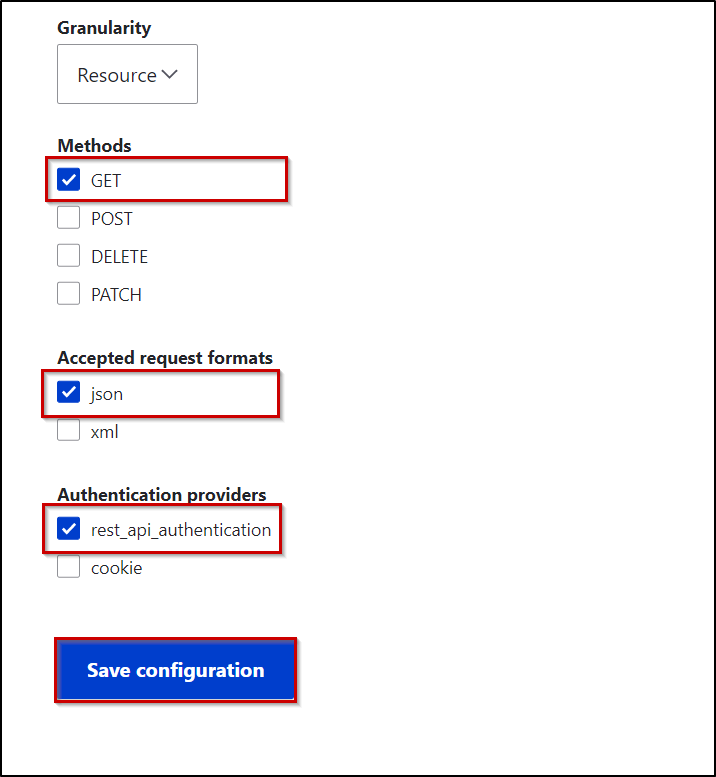
- Now, as our goal is to retrieve the user information, select the following configs:
- Method: GET
- Format: json
- Authentication provider: rest_api_authentication.
- This will allow the miniOrange REST API Authentication module to Authenticate your API. Click on the Save Configuration button to continue.
Setup OAuth/Access Token-Based API Authentication:
- In this step, we will set up OAuth/Access Token as an API Authentication
method. In order to do so, please navigate to the API Authentication tab of the REST API Authentication Module (/admin/config/people/rest_api_authentication/auth_settings)- Select the Enable Authentication checkbox and click on the Save Settings button.
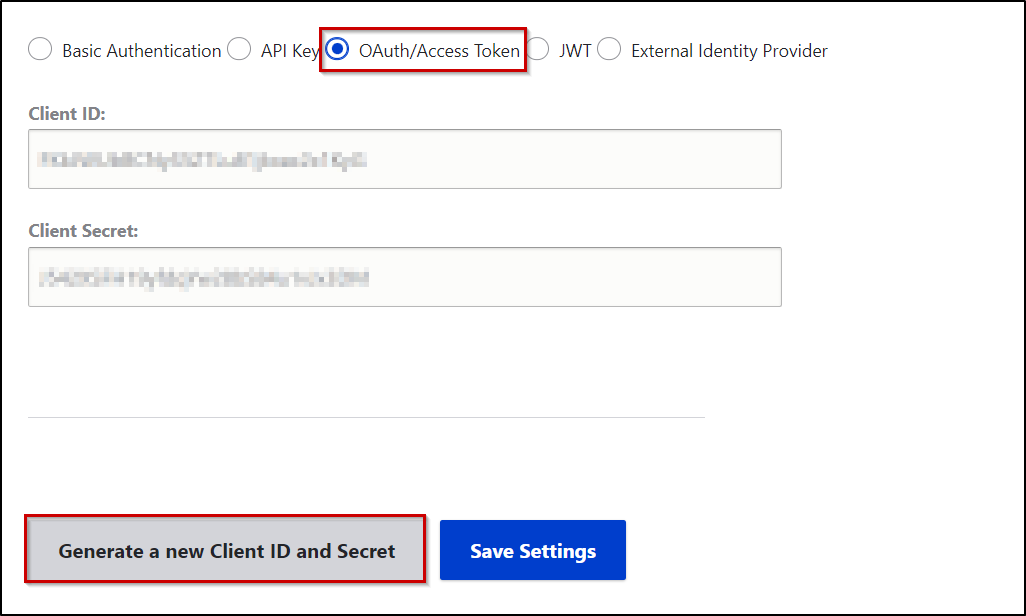
- Below the Save Settings button select the OAuth/Access Token radio button.
- Now click on the Generate a new Client ID & Secret button.
- Keep the Client ID and Secret handy as it will be used later while authenticating the Get User Info API.
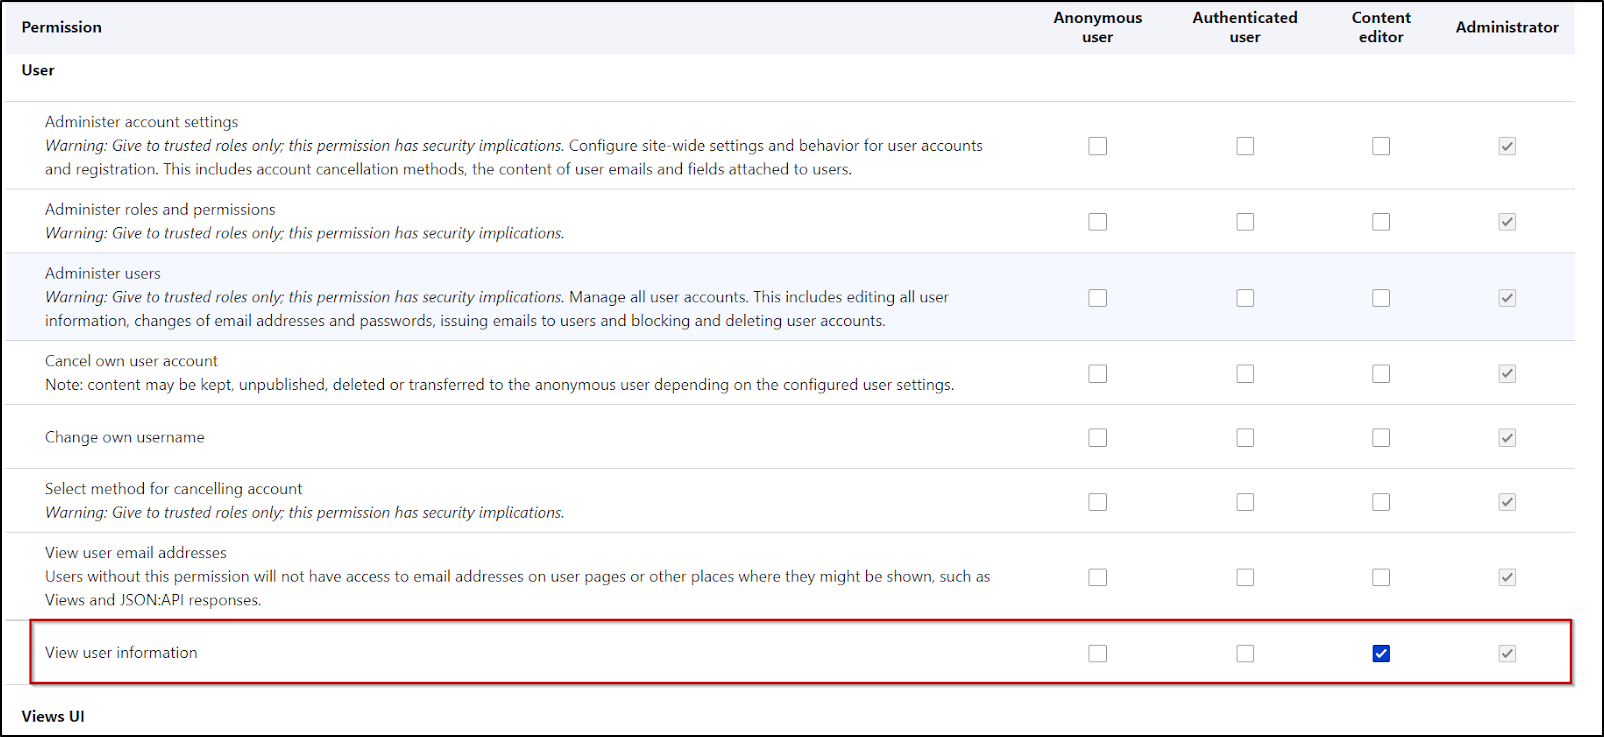
Grant Drupal roles permission to view user information:
- If you require, you can also grant non-admin Drupal roles permission to view user information. You can do so by assigning Drupal roles to the View User Information permission from under the permission section (/admin/people/permissions) of your Drupal site.
That’s it!!!
Now let’s try to fetch user information through an API call using OAuth/Access Token for authentication
Examples:
- First of all, we have to make an API call to get an access token. We will then use this to authenticate Drupal API for getting a user’s information.
- The miniOrange API Authentication module supports 2 grant types that you can use to get an access token:
Password Grant:
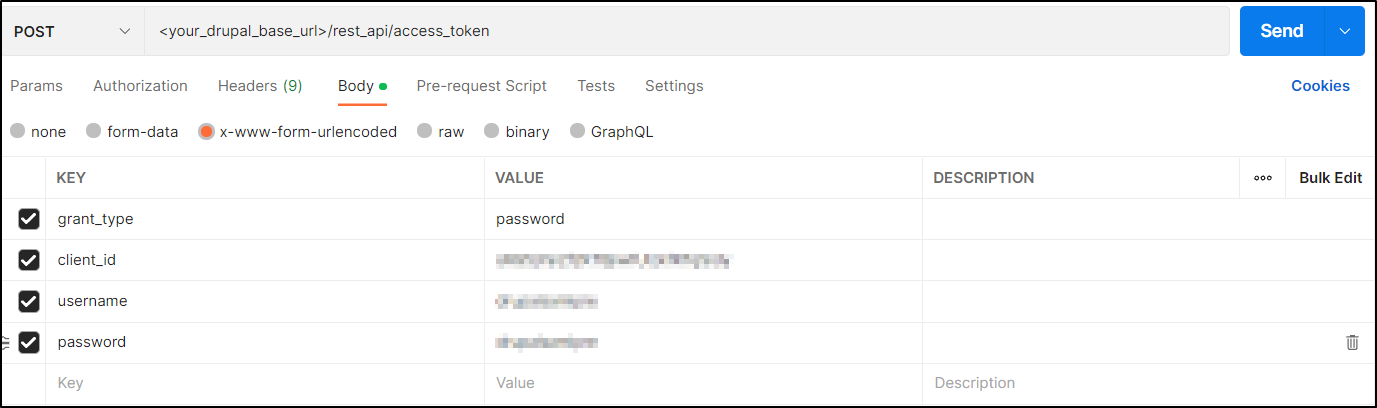
- In the Password grant, we can obtain the access token by making a POST request containing the user’s Drupal Username and Password along with the Client ID issued by the REST API Authentication module.
Request: POST <drupal_base_url>/rest_api/access_token
Body:
grant_type = password
username = <drupal_username>
password = <drupal_password>
client_id = <client_id>
Request in CURL Format-
curl --location --request POST '<your_drupal_base_url>/rest_api/access_token' \
--header 'Accept: application/json' \
--header 'Content-Type: application/x-www-form-urlencoded' \
--data-urlencode 'grant_type=password' \
--data-urlencode 'client_id= <drupal_client_id>' \
--data-urlencode 'username=<drupal_username >\
--data-urlencode 'password=<drupal_password>'
- You can also refer to the image of the Postman request added below:
Client Credentials grant:
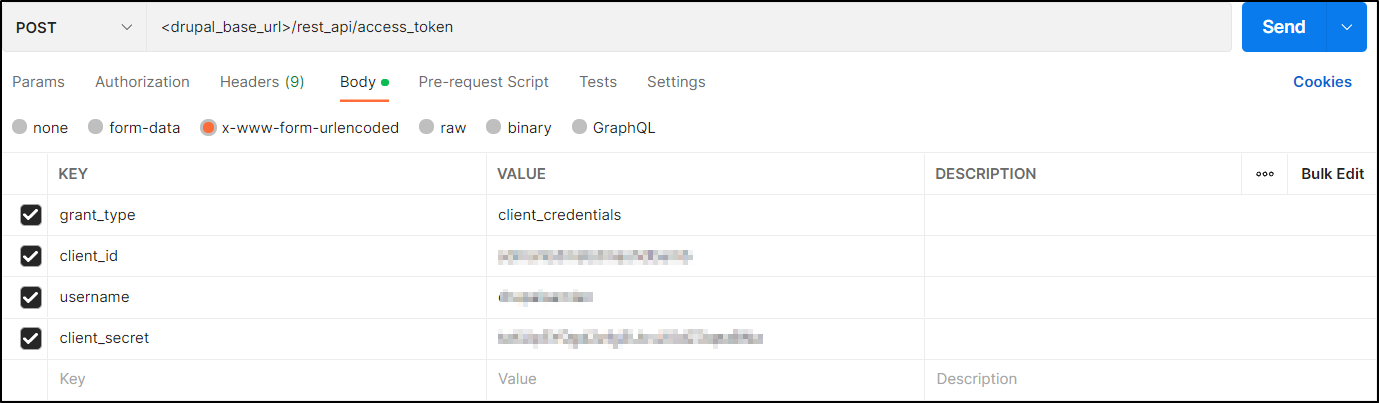
- In the Client Credentials grant, we can obtain the access token by making a POST request containing the Client ID and Client Secret issued by the API Authentication module along with the user’s Drupal username.
Request: POST <drupal_base_url>/rest_api/access_token
Body:
grant_type = client_credentials
client_id = <client_id>
client_secret = <client_secret>
Username = <drupal_username>
CURL Request Format-
curl --location --request POST '<drupal_base_url>/rest_api/access_token' \
--header 'Accept: application/json' \
--header 'Content-Type: application/x-www-form-urlencoded' \
--data-urlencode 'grant_type=client_credentials' \
--data-urlencode 'client_id=<Client_ID>' \
--data-urlencode 'username=<drupal_username>' \
--data-urlencode 'client_secret=<Client_secret>'
- You can also refer to the image of the Postman request to get an access token from Drupal using the Client Credentials grant.
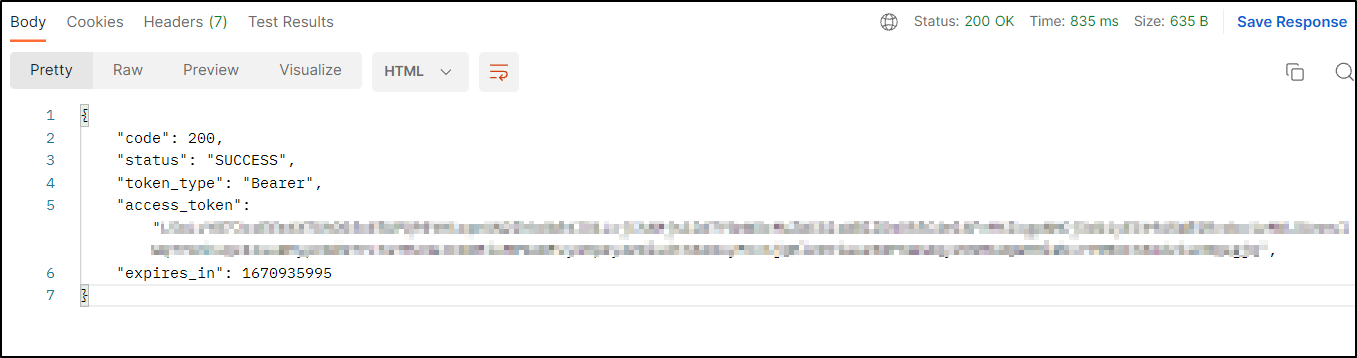
- A successful response returns the Access Token along with token expiry and token type(please refer to the image below)
Error Response:
| Error | Description |
| INVALID_CREDENTIALS |
You will get this error when either username or password is incorrect. Example: |
| INVALID_CLIENT_ID |
You will get this error whenever you send an incorrect client ID. Example: |
| INVALID_CLIENT_SECRET |
You will get this error whenever you send an incorrect client ID. Example: |
| MISSING_USERNAME |
You will get this error whenever you have missed any parameter to send in the request. Example: |
Article from Drupal Documentation.