Creating Slideshows and jQuery Carousels in Drupal 7. Part 1
Quite often, you may want to add a little spark or liveliness to your website. Sites built on Drupal in their default setup tend to have a static, plain look, while ideally they should appear more original, dynamic, bright, and alive. You can achieve this by implementing a dropdown menu, dynamically updating pages, or a banner in the site header.
CSS knowledge will help a lot—you can use it to customize the look of your site, including changing the color scheme. However, even with the default templates, you can still make your site look more appealing—maybe not perfect, but definitely better. Let’s start with a banner.
In the past, banners were mostly made using .gif images (which can contain multiple frames), or Flash-based banners. Creating GIFs can be a slow process with mixed visual results, and while Flash banners look great, they come with downsides—mainly high resource usage.
It was also possible to create banners using JavaScript, but that required more time and deeper knowledge of the language. With the arrival of the jQuery JavaScript framework, things got much easier and faster, and you no longer need to know JavaScript in-depth to create interactive elements.
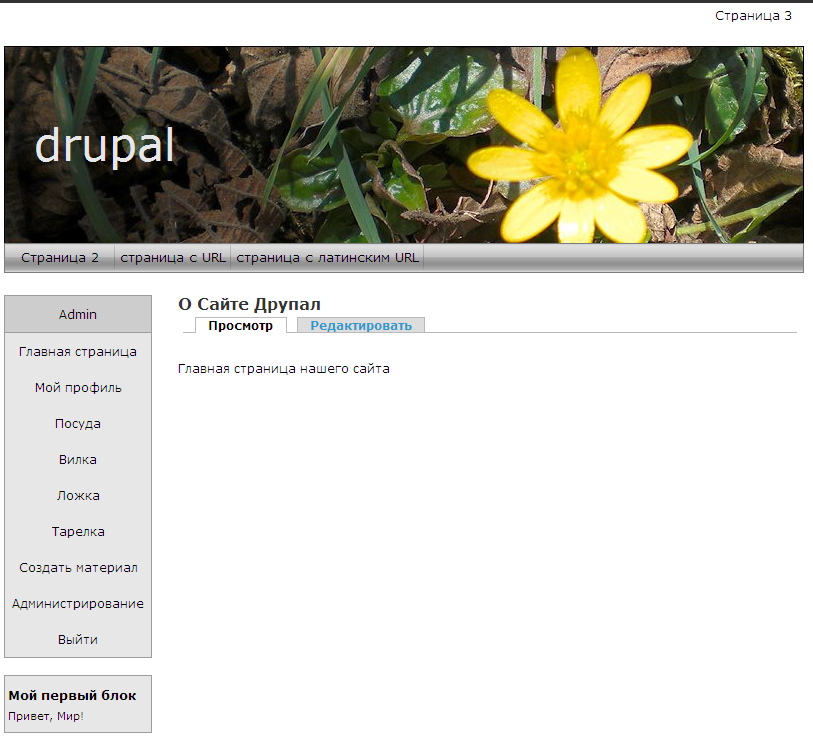
We’ll continue working with the same test site we’ve been using:
First, we’ll create a new region for the banner. Open your theme’s .info file and right after the region definitions:
regions[content] = Content
regions[right] = Right sidebar
regions[left] = Left sidebar
regions[footer] = Footer
Add a new region for the banner:
regions[topbanner] = Top banner
Now you need to choose the type of banner you want. If a simple image slideshow is enough, you can use Views_slideshow. Install that module along with its submodules Views Slideshow: SingleFrame and Views Slideshow: ThumbnailHover. These require the Views module, which you likely already have installed.
Views Slideshow: SingleFrame - implements a slideshow inside a single block.
Views Slideshow: ThumbnailHover - creates a slideshow with a thumbnail or title menu for each slide.
Create a new View and in the "Tags" field enter: slideshow
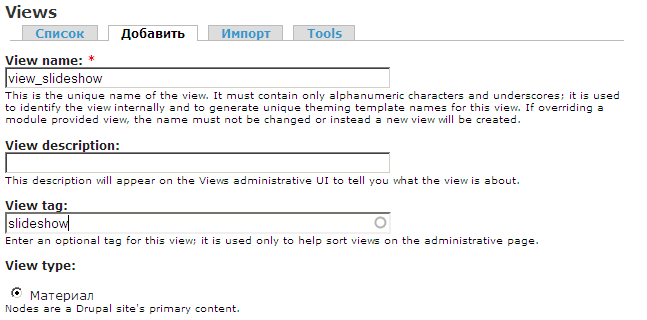
Now add the fields you want to display. I’ll use employee name, title, and photo, but you can use node title, body, or any other content fields.
In the filters, add: Node: Published = Yes; Content type = Employee (or Page, Story, or another type you created).
For Sort criteria, use Node: Post date = Descending.
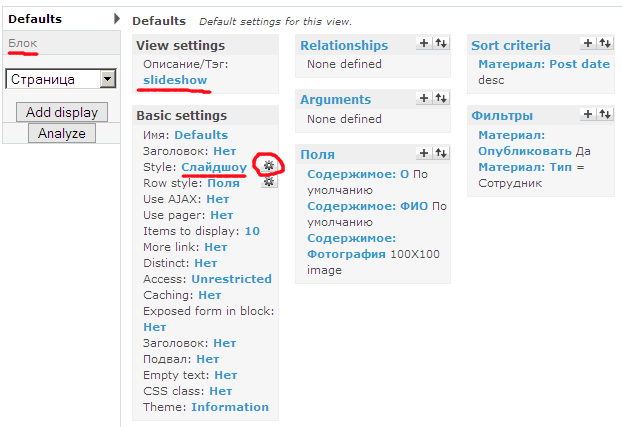
Add a display for a block.
In the Basic settings, set the Style to slideshow. A configuration window will appear for the effects. If it doesn’t, click the gear icon next to "Style: slideshow".
Slideshow settings for Slideshow mode: SingleFrame:
Timer delay: delay in milliseconds between slides;
Initial slide delay offset: initial delay before the first slide transition;
Speed: transition speed;
Controls: text-based navigation links;
Pager: numbered slide indicators;
Image Counter: shows current slide number;
Items per slide: number of slides shown at once;
Effect: transition effect used;
These are the main options—you may also find the others useful.
Settings for Slideshow mode: ThumbnailHover:
Main frame fields: fields shown in the main slideshow area;
Breakout fields: fields used in the slideshow’s thumbnail menu (e.g., smaller versions of images);
The remaining settings are the same as for SingleFrame.
Save the view, and if you created a block display, assign it to the topbanner region you defined earlier.
To customize the banner’s appearance, you’ll need to update your theme’s style.css manually to match your color scheme and layout.
In the next parts of this tutorial, we’ll create image-based buttons, a jQuery-powered banner without additional modules, and a jQuery carousel.