Webform block modules and highslide module. Contacts module in the block.
This lesson is outdated:
It’s better to use the Colorbox Node module:
http://drupal.org/project/colorbox_node
The module description explains how to use it.
In this lesson, we will explore how to create forms in Drupal blocks. For this, we will need the following modules: Webform, Webform block, Contact form blocks, Contact (the Contact module is included in the Drupal distribution), and we will also try to create a form that appears with a nice visual effect. Let's begin by setting up these modules. First, we will create a contact form. Go to Site Building – Modules and enable the Contact module.

The contact form is available at the address your_site/contact. You can either add “contact” to the URL or access the form settings through the admin menu at Site Building – Contacts.
First, add a contact category. A company site should be able to send messages to managers, tech support, the director—each should have their own category.
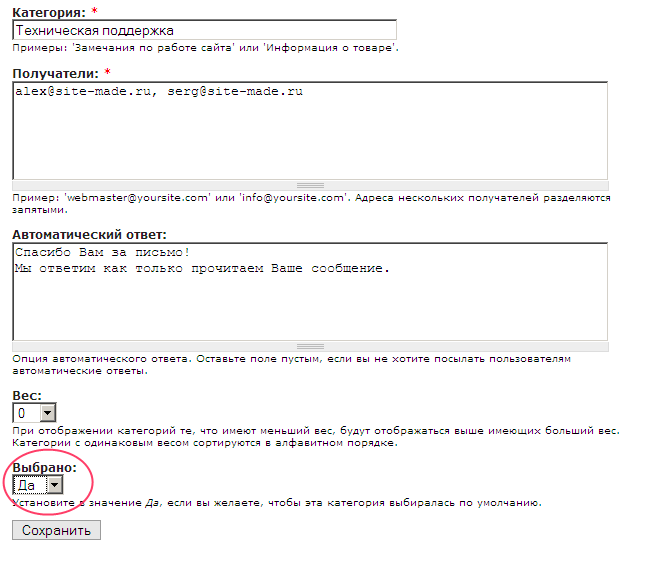
Fill out all the fields with email and an automatic reply. You can also set this category as the default when users visit the contact form to send a message.

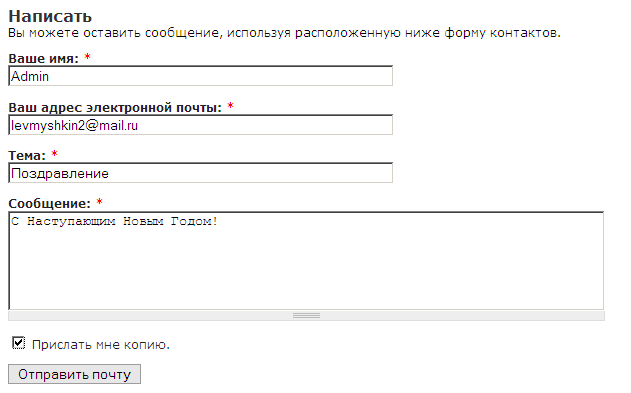
Now, if we go to your_site/contact (you can add a link to the menu for convenience), we can send a message:
Now configure permissions for the Contact module so that other users on your site can send messages using this form. Go to User Management – Permissions and set the necessary permissions for registered and anonymous users.

Now guests can also send messages through the form.
Install the Contact form blocks module to create a contact form in a block.

After installing the Contact Form Blocks module, a contact form block should appear among your available blocks.

You can place the contact form in the main content region or create a custom region and place the block there.
Webform
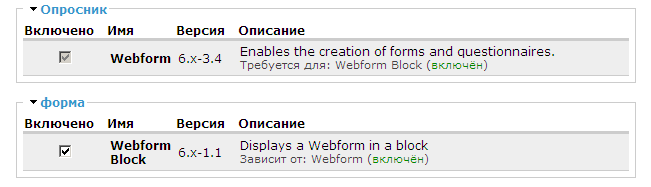
Now let’s place the contact form into a separate block. Install the Webform block module; it requires the Webform module.
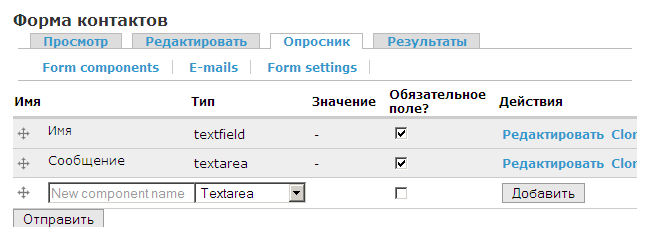
Create a new contact form using the Webform module. For details on creating webforms in Drupal, refer to previous lessons.
Thanks to the Webform form blocks module, we now have the option to place the form into a block.

Save the configuration. A new block with the contact form will now appear in the block list.
Highslide
We’ve learned how to display a contact form in a block. Now let’s try to display the form using a visual overlay effect. For this, we can use the Highslide module. To install it, you’ll need the Imagecache and Image API modules. Before enabling the module, you must download the Highslide JS library from http://highslide.com/download.php and place it into the highslide/highslide folder. If you downloaded the version with examples, locate the highslide.js file and copy only that. You can also use highslide.min.js, but rename it to highslide.js before copying.
If you open the README.txt file of the Highslide module, you’ll find usage instructions:
$options['attributes'] = array('class' => 'highslide-ajax-link');
$options['fragment'] = 'node-1';
From here, take the class name—any link with the highslide-ajax-link class will be opened using the Highslide effect. Also, add the fragment ID of the page element you want to display to the link URL.
Let’s create a block and add the following code:
<a href="<?php print base_path(); ?>
contact#contact-mail-page" class="highslide-ajax-link">Contact Us</a>
contact-mail-page – ID of the contact form.
highslide-ajax-link – the class required to trigger the Highslide module effect.
This way, you can display any link or part of a page using this visual effect.