Drupal how to install a module. Drupal modular structure.
Drupal 7:
We already have Drupal installed on our created platform. Now it’s time to understand what Drupal is and how to work with it.
Drupal can be roughly divided into two parts: CMS and CMF. Drupal as a CMF — basically the core of Drupal, located in the includes folder — is a development framework: a set of classes, functions, and procedures that simplify the developer's job. Based on this CMF, we have Drupal as a CMS, which features a modular structure. CMS Drupal modules are located in the modules folder. Each module is responsible for part of the functionality of the CMS.
Drupal 6:
The initial Drupal installation, meaning the module set installed with Drupal, is enough to build a simple business card website. Let’s explore the modules that come pre-installed.
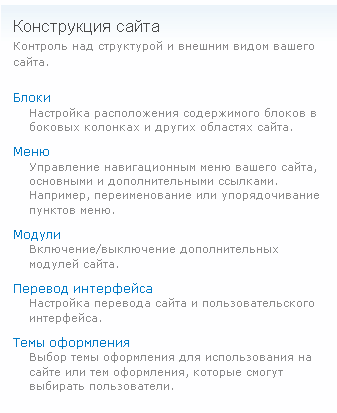
Go to the site administration section and choose "Modules" under "Site Building". Now you’ll see the list of available modules:
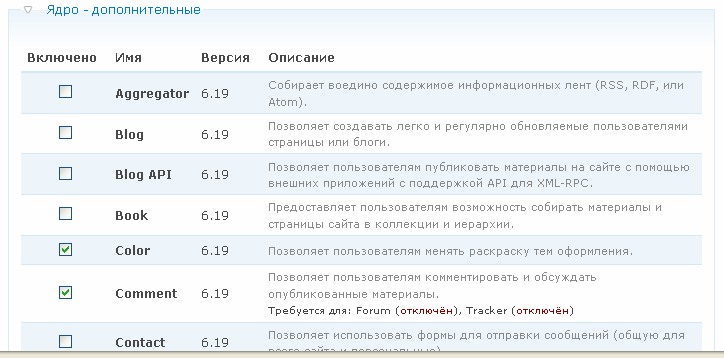
You can view each module’s settings by switching the administration panel to "by module".
Let’s look at what each module does:
- Aggregator – Used to create RSS feeds. Subscribers receive updates about new content on your site.
- Blog – Creates a blog content type; entries are displayed at
/blog. - Blog API – Allows blog posts to be published from external apps like MS Word.
- Book – Organizes content into a book-like hierarchy.
- Color – Allows customization of theme colors.
- Comment – Enables commenting on content.
- Contact – Adds a contact form at
/contact. - Content translation – Enables multilingual content translation.
- Database logging – Logs DB-related events.
- Forum – A basic forum module (complex setup; external forums recommended).
- Help – Provides module documentation.
- Locale – Translates the site interface (e.g., to Russian).
- Menu – Allows menu creation and configuration.
- OpenID – Supports login via OpenID.
- Path – Creates custom URL aliases like
/lesson-modular-structure-drupal. - PHP filter – Allows PHP code within content.
- Ping – Sends notifications to other sites when content is updated.
- Poll – Adds polling/voting functionality with results.
- Profile – Adds customizable user fields (e.g., required during registration).
- Search – Adds site search capability.
- Statistics – Tracks site visits and statistics.
- Syslog – Logs messages to the system log.
- Taxonomy – Core module for categorizing and organizing content (e.g., site menus, product catalogs).
- Throttle – Disables modules under high server load.
- Tracker – Lets users follow updates on the site.
- Trigger – Executes actions based on site events.
- Update status – Checks for core and module updates.
- Upload – Allows file uploads.
Now that we’ve reviewed the built-in modules, let’s see how to install additional ones. The first module we’ll install is Administration menu, which improves admin navigation.
Download additional Drupal modules from Drupal.org. Use the search function and filter by "Modules".
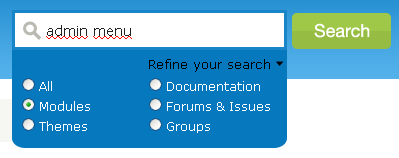
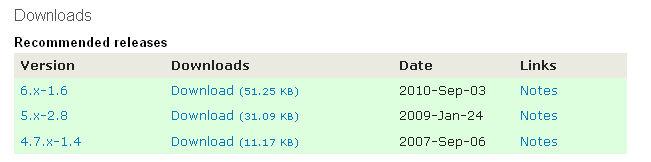
In the results, locate the desired module, e.g., Administration menu. Download the version that matches your Drupal version (in our case, version 6).
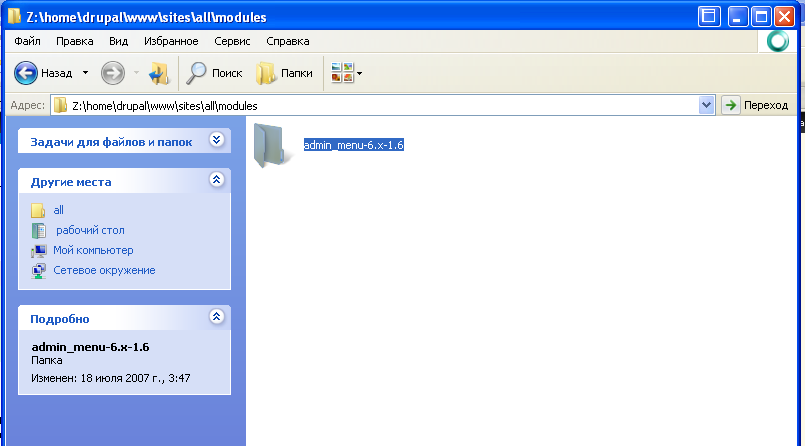
Unpack the downloaded archive. Create a modules folder inside sites/all, and copy the admin_menu module there. Although you can place it in the root modules directory, doing so is not recommended and may cause update issues.
You may organize the folder using the module name, Drupal version, and module version — it will still be detected.
Now enable the module via the admin interface: Administration → Site Building → Modules. Check the Administration menu module and save configuration. The admin menu should appear like this:

This menu makes site administration much easier and faster. It’s highly recommended to always use this module. In future lessons, admin actions and paths will be demonstrated using this Admin menu interface.